Sunday 30 October 2011

Enough's enough

Home now... Had enough... Sore hands!

But mainly I ran out of light fittings that worked, and didnt want to start the next job!

But, now have two light fittings that work in the saloon and galley, and the wiring in place for two more.

Not sure what the next task is, but a week to think about it.

Saturday 29 October 2011

Let there be light

A thoroughly successful day!

I started by fitting the plumbing to the main galley cold tap, and then fitting the water pump properly... Wiring it up through the switch panel and routing the wiring neatly... Removing the old plumbing was a nightmare... It was routed in the most awkward places possible... I nearly cocked up... Was about to cut one pipe when i realised that is was the main feed to the pump... Hard to tell when they are all green dirty copper... Also discovered that the galley hand pump is on a seperate take off from the tank... Have put a blanking plug on it as a short term fix, but will ressurect it eventually as its useful should the electrics fail.

One false start when the pump failed to prime, but a bit of mucking about, mainly by dismounting and lowering the pump got it going... And then... hoorah, running water at the galley.

I did have to refill the water tank as i'd drained it to cut the old pipework out... Lots of new creaking as it filled!.. I spent a while panicking, looking for leaks, but none present.

You have no idea how nice it is to be able to wash your hands!

Then i started the saloon lighting

I spent a while trying to work out where to route the wiring, and once decided, quite a bit longer trying to feed the wires through several small gaps... Eventually i suceeded, fitted a temporary light in the galley, et voila!

Its only the one, but its great to have a light that doesnt need carrying around with me!

So... Slowly progress is being made.

Tomorrow i'll fit more lights, and then start on the forepeak wiring and perhaps have a bit of a tidy up... Now i've got light, I can see what a mess it is!

Panelled and painted

Engine room is now repanelled, and second coat of paint on last night.

Managed to relocate the accumulator and mount the water pump before it got too late as well. The water pump previously was just laying loose on the shelf, held in place by nothing more than the length of the attached water pipes!

Removing the remaining bits on the engine room bulkheads was 'fun'.... Several things were nailed (yes, thats nailed) to it...

So today will be reconnecting the water supply and providing a properly routed power supply to the pump. I'll only do the cold side until i've got the calorifier... Will mean a trip to the chandlery for a bit of extra pipe, and to screwfix for a set of tap connectors.

I also mounted the new battery isolators. Only practical place is belpw the companionway steps, which isnt ideal from a 'getting wet' perspective, but i figure that if they are getting wet enough where they are to cause a problem, then we've probably got bigger problems!

Thursday 27 October 2011

Calorifier ordered

Calorifier on the way!

But not until next friday, so will be fitted next weekend.

In the meantime, back down to Phoenix tomorrow, and hoping to get the cold water plumbing in.

Once the calorifier is fitted, then we'll have hot water again as its got an immersion heater...

Then, once i've got the engone room cladding finished, i can start getting the wiring done...

Once the lights are in, then we're getting back to being habitable...

And once that's underway, then the varnishing can get underway...

And once she's lifted, the seacocks can be replaced, new instrument senders fitted and the bilges painted...

After that will be the fridge/freezer and heating and we're well on the way!!!

Wednesday 26 October 2011

Plumbing

Just been and fetched all the plumbing bits... Doing it throughout with Speedfit.. Easy, cheap and much better for a boat.

Only thing i havent got yet are the tap connectors as i didn't measure tap thread sizes, and indeed we may fit new taps anyway...

Now to order the calorifier... Not cheap, but with a twin coil, essential for the water heating system we plan to fit

Tuesday 25 October 2011

Still progressing...

...but stopped for 2 days.. Want to get some quality family time in while i've got a week off and its half term, amd the boat isn't habitable!

Still, managed to remove all the headlining from the saloon and galley, and get half the engine room recladded and the first coat of paint on... Also got some of the plumbing removed.

Tomorrow, will get the plumbing bits to put in new water system... Just hot and cold supplies via accumulator and calorifier, the heating can wait... But will order a new calorifier with twin coil, as that will be needed for planned water heating... No more running the engine to heat the water!

Engine room is going to look great... Much tidier, and more organised... Still got a few bits of cable to remove, mainly the alternator cabling which runs via a rather rusty TWC controller, but i'll leave that until i've worked out what is connected to what!

All in all, feels like progress... Had to do tons more dismantalling to remove headlining, so boat looks like a jumble sale at the moment... But it'll come together eventually...

Monday 24 October 2011

The rules of boat maintenance

As i sit here in the dark, i'm reminded of several of the unwritten rules of boat maintenance...

Rule 1 - the one tool you will need most is the one tool you have left at home

That stubborn bolt would have been a lot easier if i'd remembered the spare 10mm socket after the boat one went for a swim a couple of years ago

Rule 2 - the law of expanding opportunity

No job is too small to reveal another task that will need completing prior to finishing the first. This rule can expand to several iterations.

Rule 3 - the rule of started jobs

It is required of all boat maintainers to have at least 4 current jobs on the go, and to do a little on each in random order

Rule 4 - the more essential it is, the more likely it is to get broken

Especially when its your one and only light, hence me sitting in the dark

....so, after removing yet more wire from the engine room, i've started cutting the wood for the engine room cladding, which needs doing before i start to rewire in earnest so that the wiring can be clipped up neatly... And after cutting the first panel, have concluded that it will not go in while the plumbing remains in place... So i have to start that tomorrow as well...

In the meantime i've started taking the headlining down. This sounds like a straightforward job... Oh no, not a chance... It needs to come down to put new wiring in for the lights, and also because its a bit tatty, so we're replacing it all. Only every bit is held in place with wooden battens that have been screwed in and then the screw holes plugged with wood to hide them. So every screw needs digging out... Removing 4 panels took me 3 hours, and another 25 to go...

On the positive side, i put a temporary feed to the water pump, so now i have running water to make tea and wash my hands.

It looks like it'll be a busy winter though...

And now off to bed.. If i can find it in the dark.

Sunday 23 October 2011

Great late season weather!

The annual ybw ECF 'laying down supper' this weekend, this year in the Colne Yacht Club at Brightlingsea... last time we went there, the food was OKish, but the service was terrible, but that was a few years ago... so we were intrigued to find out how it had changed...

But mainly, we were worried about the weather...

We'd been invited to sail onboard Pipedream II, a friends boat... which we were looking forward to... and wow what a weekend!

A belt up the Wallet on Saturday with apparent wind of 25kts, course hard on the wind... reefs in, and over on her ear... but the sun was out, and while cold, it was clear and blue skies that made it...

A great night in CYC, with food that was excellent, and very friendly service... big bonus...

and then Sunday... boy what a sail...

A broad reach back in blazing susnshine... we started well wrapped up, and gradually lost layers as the day went on... 15kts of wind... superb... just a wonderful sail in near perfect conditions.

Spuring me on to get on with Phoenix.... good job really.. i've got the week off to work on her!

Miles logged 60nm
Miles this season 245nm
Miles since this blog started 5,951nm

Friday 14 October 2011

slowly but surely

Remaining electrical bits arriving today... no visit to the boat though... C is sweet 16 this weekend... so we're going to the beach to fly kites instead!

Monday 10 October 2011

battery location

Was planning on putting the batteries on the ledge in the engine room.... having second thoughts, and may well put them on the bottom shelf of the large cupboard in the engine room... neater, better protected, and leaves room for the watermaker and fridge compressor... will need to put a few vent holes in the cupboard door though...

Need to use Mk1 eyeball and stare and contemplate for a while in order to see what I think.

its only money...

I've just ordered the remaining bits to get my new engine room electrical install completed.

I've added a Sterling Battery charger to the equipment list, as I wasn't confident in the old one... it was rather ancient, and didn't seem to float the batteries very well... plus it was a single output, which meant that the engine and domestics needed connecting in parallel in order to charge everything, which I didn't like.

However, that wasn't the main expense... no... that honour was granted to the battery cables. In order to get a neat install, i'm routing them over the top of the engine room. That means that they are a bit longer than normal. Add to that, the fact that i've ordered tinned versions, and perhaps slightly overspecced them at 40mm2, then the total for cables (to admittedly connect both batteries, the isolators, the 1-2-All switch, the Alternator controller and the battery charger) was over £250!!!

Finally, a handful of ring terminals for the cable, 6 new battery clamps, three nice BEP isolator switches (one of which isn't needed for know until I install the windlass wiring, but wanted to fit all three together to make it neat) and an earth commoning point, and the grand total was nearly £600.

We will have a terrific power installation though, that is reliable, tough, and efficient.... expensive upfront but will, I hope, pay back for itself many times over in reduced fuel costs, longer battery life, and most importantly of all, confidence in the engine starting!

Sunday 9 October 2011

phew what a weekend!

Arrived on Phoenix at about 19:00 Friday, and immediately set too in removing wiring... trying very hard to keep at least one light and the radio working as long as possible.... and worked through to about 23:00 where I collapsed exhausted into bed.

Early start on Saturday, and at it again by about 08:00.

It was becoming clear that removing the wiring was going to be a mammoth task... every little wire was buried deep in the darkest recesses of the boat, and required mases of dismantaling, revealing dusty, smelly areas that hadn't seen the light of day for years... and blessed with corroded and awkwardly placed screws that needed removing... some of cable was slimy with years of gunk, some dried out to the point of just snapping when pulled. It was clear that the wiring desperately needed replacing, as i'd already known.

A good deal of the wiring ran through the bilges... a pretty daft place to put any electrics, and after our little flood of the 2 weeks agao, was nicely slimy with a greasy oily coating... pretty unpleasant to remove.

One area of the bilges still needs pumping out, and so some of the cable was even underwater still... I haven't pumped it out yet, as the water is contaminated with diesel, and I don't want to pump it into the marina... and its enough water that I can't put it into containers easily without removing the pump outlet, which is below the water line... it'll have to wait until we are ashore, and then I can remove it 10 gallons at a time!

The hardest job of all was removing battery cables... for some reason the domestic batteries are located under the saloon seating, which seems a bit odd given the amount of space in the engine room, and because of this, some pretty heavy duty cables run under the bilges... they were absolute pigs to get out, as they wouldn't easily pull through the holes they had been run through due to how stiff they were.

Eventually though, they were released from captivity, along with the 3 way switch, and the 2 isolator switches (which are being replaced with more modern versions, and also being relocated to a more sensible position.

I'm also fitting a Sterling Alternator to Battery controller, as this will make better use of the power generated from the alternator, as well as providing a spilt diode facility to ensure the engine battery is always kept topped up.

I consequently moved the batteries to the engine room, and measured up for the new battery cables that i'll order this week. That'll be expensive... they're about £16 a metre!

So... all the saloon wiring removed, along with everything to the chart table... most of the wiring forwards to the forepeak... and the loom back to the aft cabin... Still got the wiring in the two cabins to deal with, but that should be easier as there isn't anywhere near so much.

In a couple of places, the wiring is buried behind teak tongue and groove panelling over a bulkhead leading to a light fitting... THis wouldn't come out no matter how hard I pulled, and so there was no chance of mousing in a new cable... so this had to be cut off and left in place.... its not visible, only a few inches of it overall, so no matter.

While I was revealing the wiring, I also discovered the copper water pipe and the copper gas pipe, neither of which look very healthy, and are being replaced anyway... so that's one task that at least I undertand where to hunt now.

I finally stopped at 23:00 on Saturday, and then started again at 07:00 Sunday, and worked through to about 16:30.

At this point, i'd had enough... with so much wiring removed, i'd lost the radio, as well as the water pump, so had no lights, no water and nothing to listen to... completely had enough!

I'd also removed hundreds of screws.. some with obvious uses, some seemingly completely random!

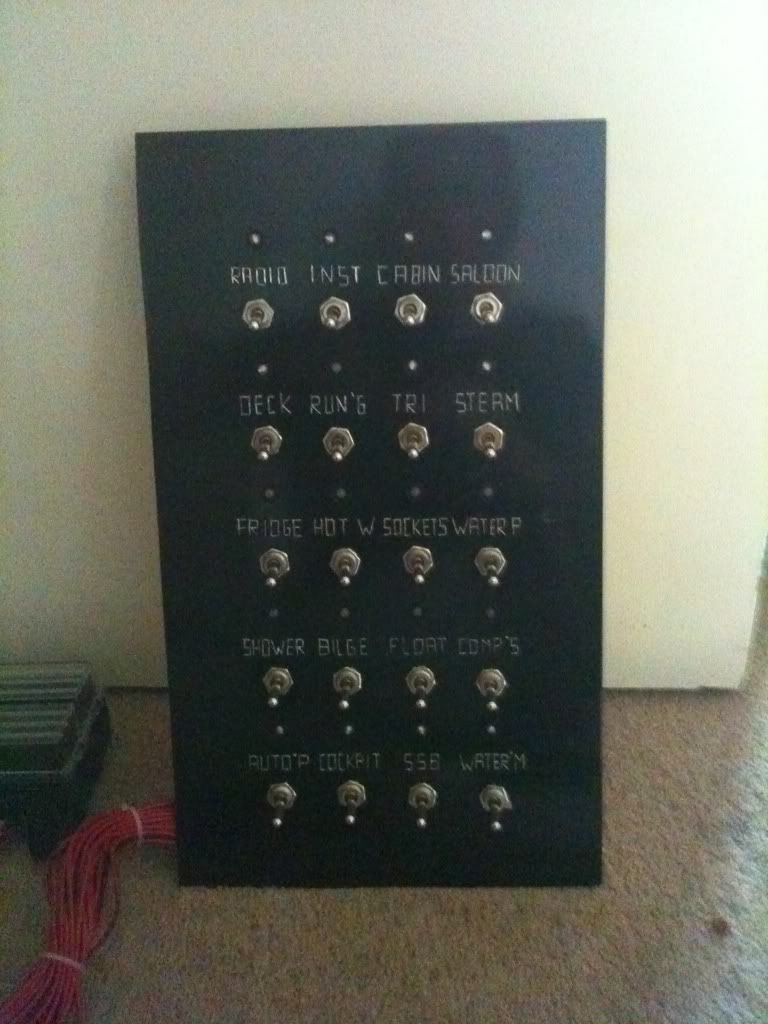
As part of the work, i'd removed all the wiring from the switch panel, and the panel itself.... and installed my new panel... it looks great even if I do say so myself!.. all worked as expected, with two exceptions... one light came on immediately, and stayed on regardless of switch position.... easy solved... i'd go the connections on back to front.... and the second.. the LED went pop immediately upon powering up... i've got some spares, so i'll just need to replace it... other priorities right now.

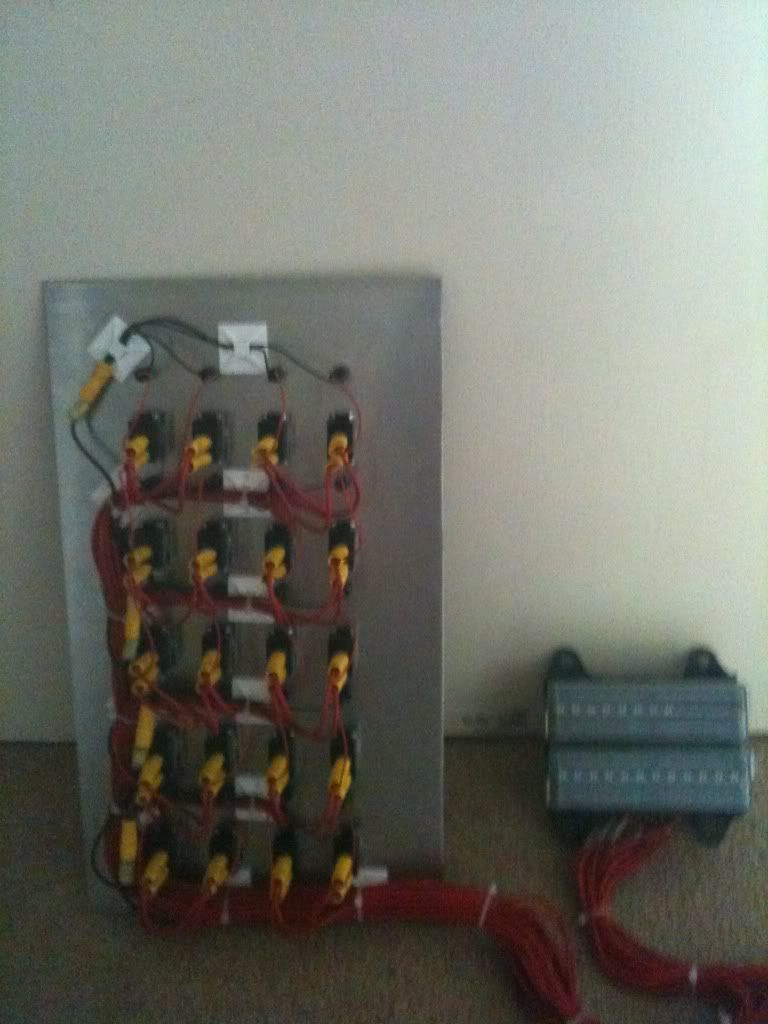
The wiring behind the panel is completely refreshed with a new fuse box, and all finished onto bus bars and a distribution panel, awaiting the main wiring to start going in.

One more good weekends work, and we should start to see some services up and running again, especially the water pump, and lights!

One final thing... found another leak... when the new pedestal was fitted just before we bought her, it needed new mounting holes.... and the old ones weren't filled... and they leak... that'll be easily solved!

Pretty happy with progress overall... no jobs ticked off my (long) list as completed, but an awful lot got well underway.

Piccies to follow.

Tuesday 4 October 2011

what order

sat here trying to work out in my head what order to do the major jobs in...

After seeing a picture today of a lovely refit on an EVO25, its quite clear than I need to paint the bilges, but in order to do that I need light, and that requires the 12V to be redone... to do the 12V, I need to get the charging sorted out, so that's a look at the 240V, and a bit of re-routing (currently the live 240V circuit runs in the bilges!!!!)

So... I need to get the engine compartment sorted, recladded, and tidied up to provide a better, more secure and organised home for the charger and wiring...

And then of course, there is all the varnishing to be done below, which needs the old varnish stripping off, so lots of dust... which will make a mess of my nice new bilges, so ought to be done first... for which I need light.... and there, i'm back where I started...

Along the way, i'm going to replumb, but that would be better after painting the bilges...

I also need the boat ashore before too long to remove old seacocks and through hulls, and to get the bilges pumped out and cleaned properly before painting them..

None of this will be easy without an operational fridge, or heating as there will be limited food, and freezing fingers otherwise as I work through the winter...

Sigh.... where the heck to start!

On the positive side, I found a source today of 7' x 4' sheets of 2.4mm exterior grade ply to reclad the engine room (it's currently hardboard over the sound insulation) for a meagre £4 a sheet!!!, so that and some white paint has to be a good starting point... only it'll make the engine look even more scruffy, so maybe I need to get the rocker cover, header tank and heat exchanger repainted.... and off we go in circles again!

So... decision made... this weekend will be recladding weekend... lets see how far I can get in one weekend...

I've also had this grand idea.. currently, the locker in the cockpit just opens into the engine room... great for access, but not much good for storage... so i've worked out a way of boxing it in without losing tons of engine room... I need to take a look this weekend and mull it over a bit, but think i'll still have space for the watermaker and batteries, as well as creating a decent sized (removable) cockpit locker, and not loosing access to the useful cupboards at the back of the engine room. We'll see!

Sunday 2 October 2011