Been down to the boat to put a dehumidifier onboard, and all is well with her, other than she clearly is feeling unloved with me not having been down to visit to 4 weeks.
I didn't stop long, but came home and stripped another 9 doors back to bare wood.... just 5 to go!
I will try and wire wool them tomorrow, and perhaps a quick whizz over with a sander, and then the first coat of heavily thinned varnish.
Time to get on with her, as the 2013 season is already looking at risk!.... however, the biggest delay is likely to be in gathering the funds for the multitude of tasks that still need doing.... i'm prioritising the tasks that will make her sailable aggressively though.
Sunday 30 December 2012
Sunday 18 November 2012
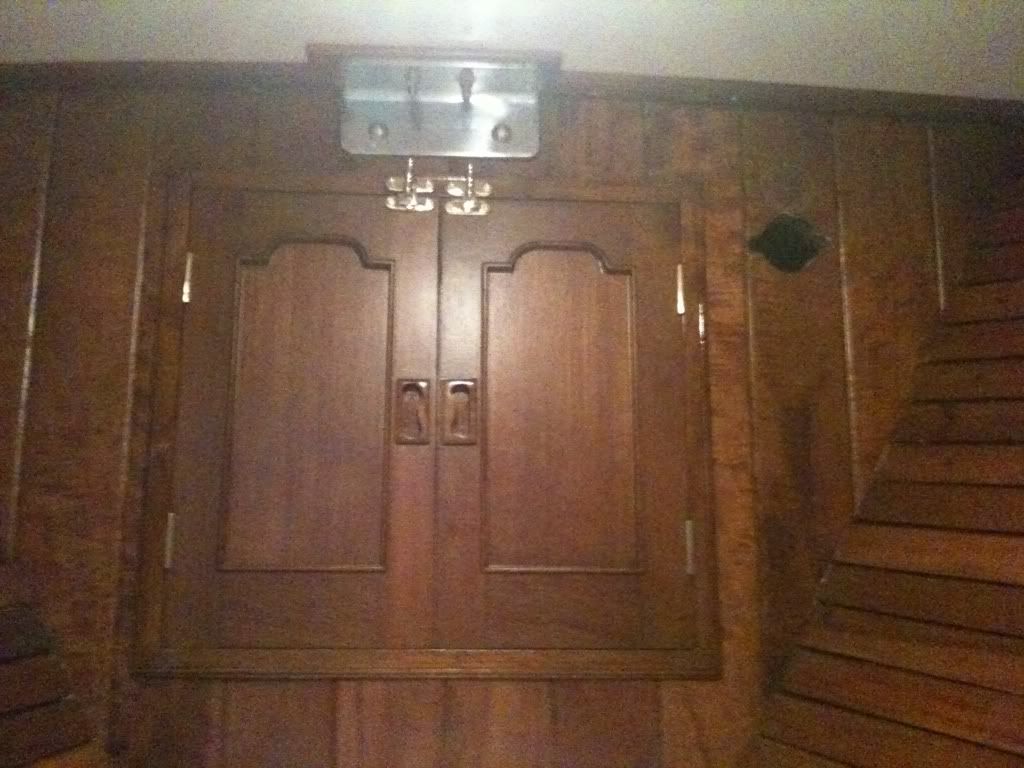
more doors
Another 5 doors back to bare wood.... that's 11 done now... and 11 to go... plus a full size door (that separates the forecabin from the saloon)..
Also been researching door handles and think i've found what i'm looking for... so thats more brass to order!
Saturday 17 November 2012
hoorah!
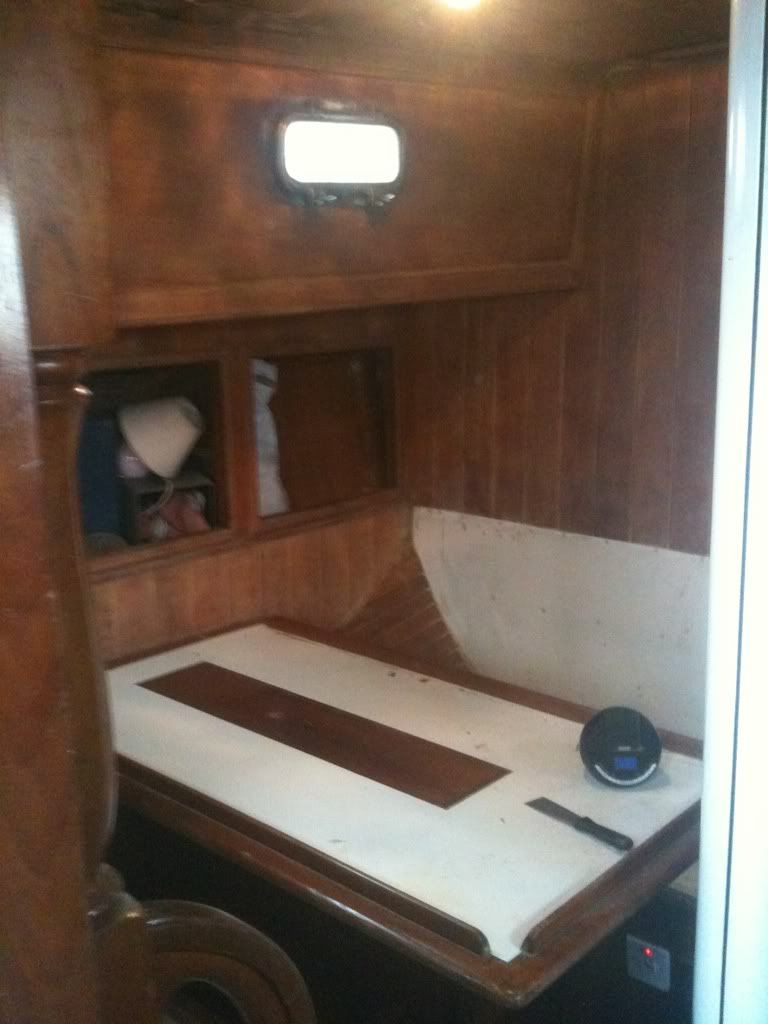
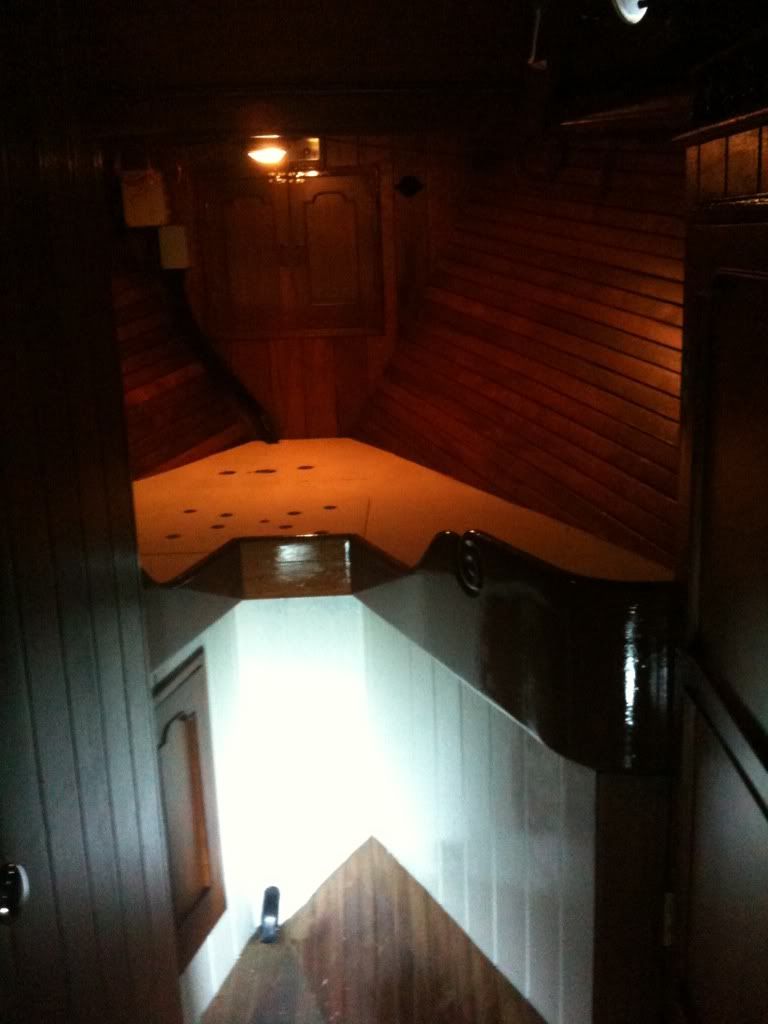
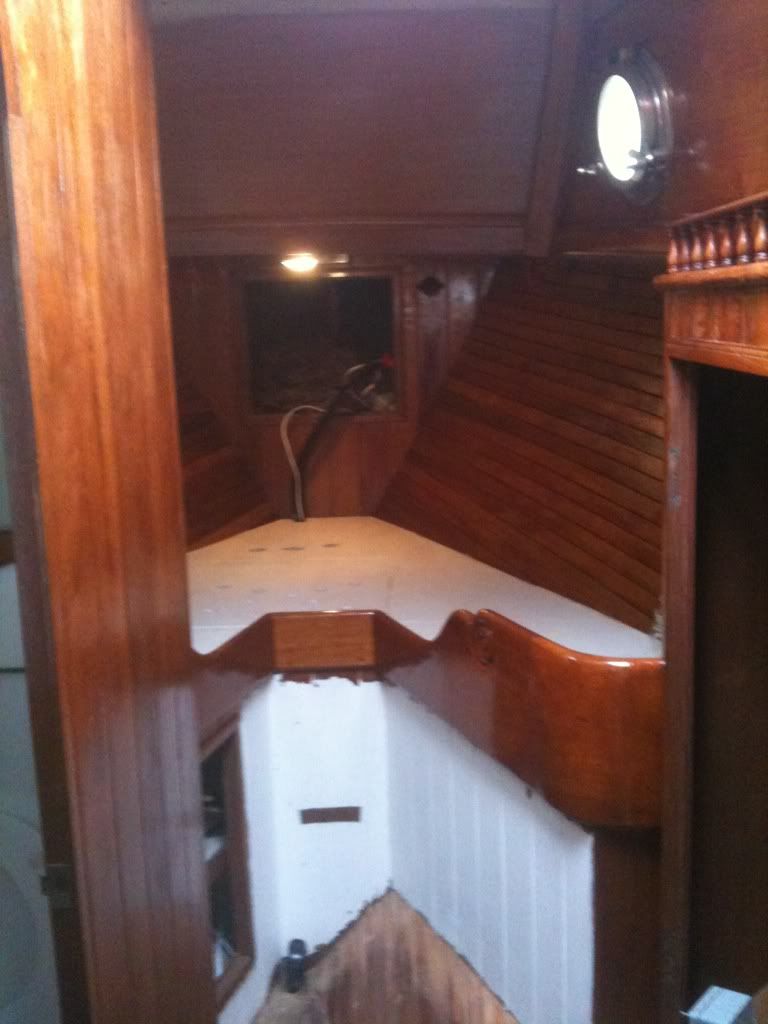
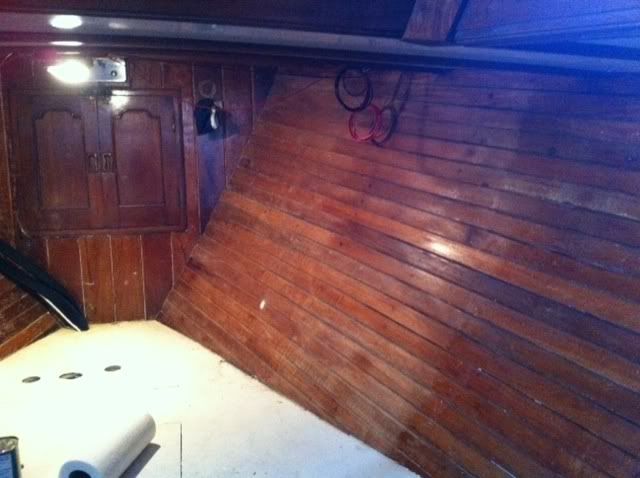
All varnish is now removed right back to the aft cabin (excluding the soleboard - thats the floor boards for you landlubbers!).... just the passageway to varnish, and one more coat on the galley, and thats the varnishing done.... until I start the aft cabin (much later!)
Now to finish the doors, and get them refitted... then the soleboard, and I can start fitting out the saloon again... get the headlining in, fit the instruments, the last bit of rewiring, the final plumbing, rewire the windlass, rewire the engine... OK... so there's loads to do still!!!!
Sunday 11 November 2012
door fest
Not on the boat this weekend, but consoled myself by starting on the pile of doors currently cluttering my hallway.... 6 down, about 25 to go... admittedly, i've started with some of the smaller cupboard doors, but they look better just for getting the old varnish off!
Once i've got them all back to bare wood, then i'll varnish in a single coat per sitting...
Also got to buy the new hinges and catches yet... putting it off as they are bloody expensive... about £2 each... and with 30 something doors, and 2 per door, it'll not be cheap.... and the catches, fortunately only one per door, are about a fiver each.... ouch!
Saturday 3 November 2012

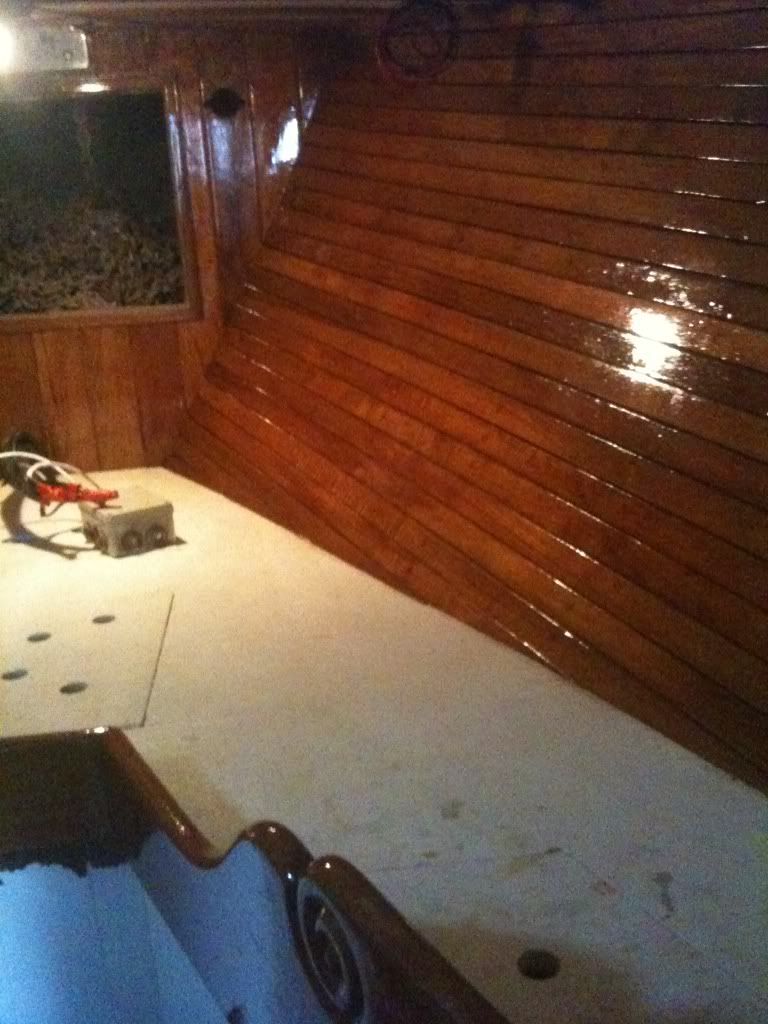
Stripping a coffin!
Well, thats what these berths are called!!!
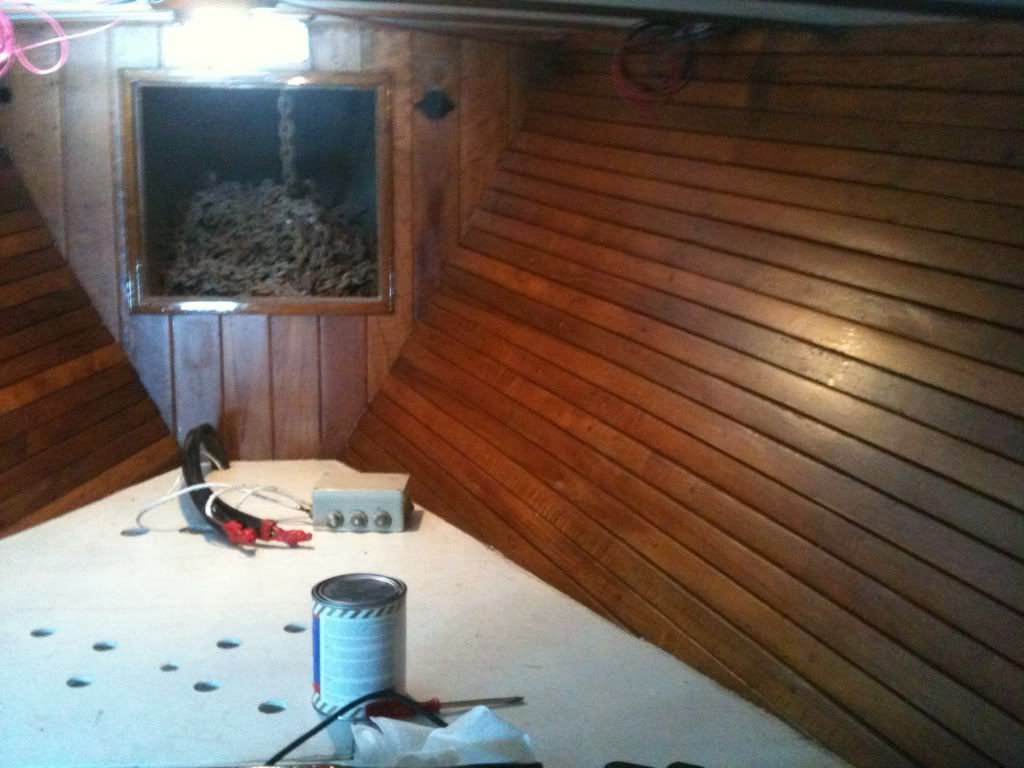
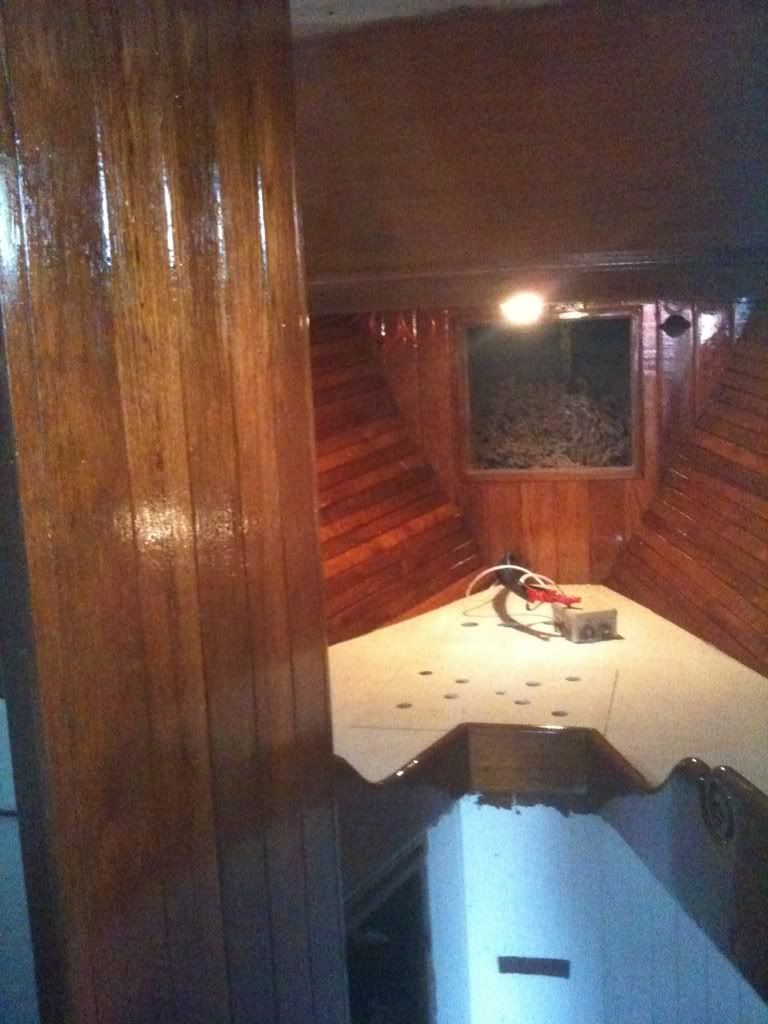
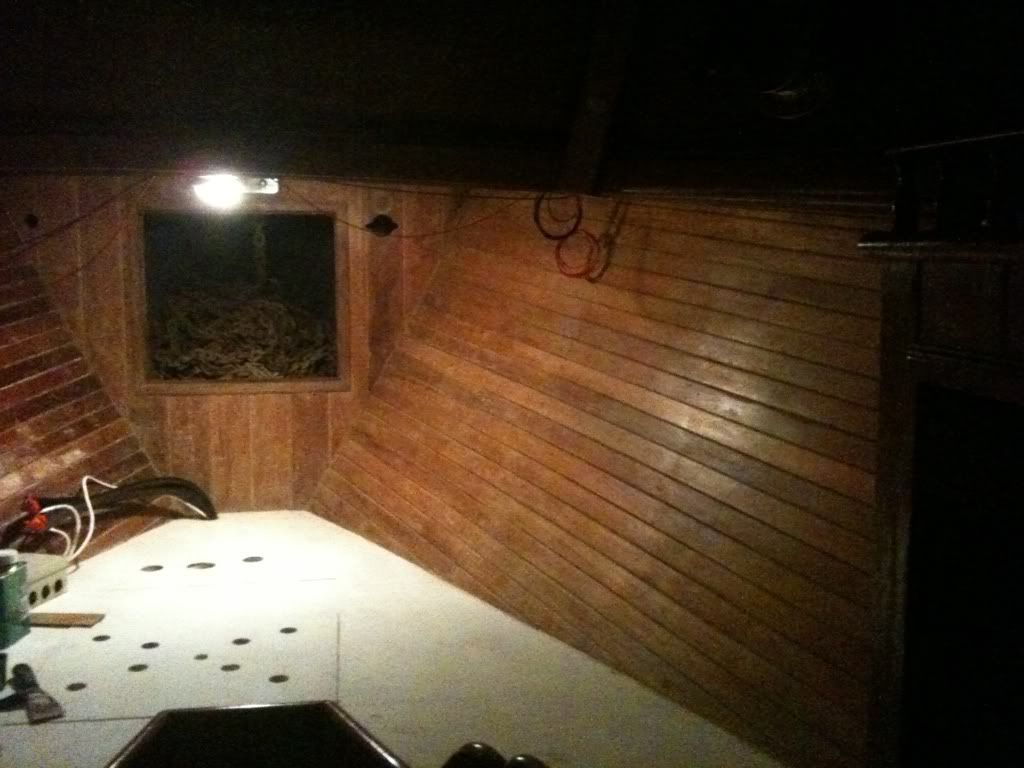
I've started the passageway between the main saloon and the aft cabin... and making good progress....
At present i'm trying to work out why the headlining wont yet come out... Must have missed a screw somewhere!
I've started the passageway between the main saloon and the aft cabin... and making good progress....
At present i'm trying to work out why the headlining wont yet come out... Must have missed a screw somewhere!
Saturday 29 September 2012


A bit duller
...it was pretty shiny after all beforehand.
The saloon is now (almost) resplendent in matt varnish. I ran out just before i'd finished, so a bit more to do yet.
It looks much better now, instead of needing sunglasses down below!
Pics to follow.
The saloon is now (almost) resplendent in matt varnish. I ran out just before i'd finished, so a bit more to do yet.
It looks much better now, instead of needing sunglasses down below!
Pics to follow.
Thursday 6 September 2012
Woodwork
Have roped my father in to helping with the minor construction around the chart table, and the remaking of the hatches.
Partially because he has the right tools (including a band saw, circular saw and a bench mounted router), but also because he's just really good at this sort of thing!
The hatches are fine, but the joints aren't as strong as they should be, and a remake will ensure they are watertight.
Partially because he has the right tools (including a band saw, circular saw and a bench mounted router), but also because he's just really good at this sort of thing!
The hatches are fine, but the joints aren't as strong as they should be, and a remake will ensure they are watertight.
Tuesday 4 September 2012
result
Just managed to source 5 sheets of white Formica at a very appealing price!
I need it to replace the headlining in the very outboard edges of the main saloon... its OK on one sides, but on the port side, its a little scorched where its been in contact with an oil lamp!
I doubt the fitting exercise will be anywhere as easy as the buying one though!
Sunday 2 September 2012


Second coat done
Another hour this morning, and all is done on the second coat.
Everywhere is very very shiny!
Only the final matt coat to go and then its on with the next job.
I've spent a bit of time trying to decide what to leave in gloss, as a feature and still not sure... Will probably make it up as I go along!
Now i've got a monster pile of doors at home to start varnishing.
There are a number of jobs I could start next and haven't quite decided which yet... Maybe get the passage way through to the aft cabin done... Finish the saloon table... Start the sole board in the forepeak... Who knows?
Pics to follow
Second coat
Another hours work and the second coat is done!
After the dull first coat, the second coat is very shiny!!!
Photos tommorrow.
After the dull first coat, the second coat is very shiny!!!
Photos tommorrow.
Thursday 30 August 2012
Lights, tricolours, deckies and climbing gear
Thats what I need to buy at the Southampton boat show...
The lights will be the expensive bit... There are 10 of the overhead ones and about 6 bulkhead lights... And they're £27 and £18 respectively each... and thats with a standard bulb... add another £6 per light for an LED... Ouch!
I'm going to buy the Nasa LED tricolour... was going to get the combined anchor light version, but firstly I don't really like masthead anchor lights and secondly Nasa have put a daft two wire system on it, that means a DPDT switch, and mucks up any sensible switch panel!
....the deckies... Mine have holes!
I've also just bought a climbing harness on eBay... I feel a trip to the masthead coming on.... Aerial, lights and wind instruments to fit!
Monday 27 August 2012


First coat on!
The entire saloon is now resplendent in its first coat of varnish.
It took about 10hrs in total to put one coat on, so with 3 coats planned, that's two weekend's work to finish... Unless its very warm, in which case I might get it done in a single weekend.
As usual, the first heavily thinned coat largely soaks in, so a bit dull... The next will be unthinned, and then the last matt coat to finish (other than a few carefully chosen bits which will be left in gloss)
Overall, it's looking fab though... pics to follow.
Sunday 26 August 2012
Varnish!
A full day!
Finished the last bit of sanding, and then spent 5hrs removing dust!!!... Lots of sweeping, brushing, hoovering and tack ragging...
A nice dry and breezy day helped... opened the hatches and the dust blew out!
Then another 2hrs of wiping down with white spirits and then the varnishing, after several months of prep, was started... Yeah!
Only got a 1/4 of the saloon done before light stopped play, but it's a start!
Saturday 25 August 2012
Almost ready to varnish
A good day. The chart table area is back to bare wood... And half way through the remaining bits by the companionway steps...
Should get that done tommorrow..
And then will begin removing the dust.
Once that's done, i've got a small area of melamine to remove and then can start the varnishing.
First job will be a full wipe down with white spirits. So hope its dry, and I can open all hatches...or i'll be as high as a kite!
Should get that done tommorrow..
And then will begin removing the dust.
Once that's done, i've got a small area of melamine to remove and then can start the varnishing.
First job will be a full wipe down with white spirits. So hope its dry, and I can open all hatches...or i'll be as high as a kite!
Tuesday 21 August 2012
switch panel
My nice shiny new switch panel will need replacing!
Two of the twenty switches have already failed.... that's what you get for buying them cheaply from eBay!... also, while they were rated at 15A, I suspect that the problem is the current I am putting through them... both of the failed switches have been on the fridge circuit... which I estimate at about 8A...
Anyway.... I've researched some nice new switches... not particularly expensive, and I may well use it as an opportunity to firstly use switches that have built in LEDs to remove the need for seperate ones (and they are also perhaps a bit too bright currently), and also to put a relay on the two or three devices that are a bit heavier on current, to take the load off the switch itself.... again, not expensive to do.
I did worry about another 'thing to go wrong', but in my experience, relays are pretty robust, and no more likely to fail than the device its powering itself.
I have also perhaps used the rewiring to recognise that the switches i've fitted aren't quite the right ones, and I could do with a couple of others, as well as lose a couple....
Finally, I may well look at getting the panel made up professionally.... looks a lot smarter... must talk to friends (Clive - if you're reading this, give us a contact name!) about where they had it done.
Sunday 19 August 2012
Inside again
Fed up with external varnishing (and having run out of varnish again)... I decided to get on with the remaining internal varnishing removal in the main saloon..... The chart table...
I've got half of it removed.... Should be done with another good day's work.
I think i'll have a little construction work to do to fit the radio, SSB and anything else that I need at the chart table... such as a stereo...
Got the rough layout in my head, so will have to do some research on wood options.
Saturday 18 August 2012
Fuel condition
Just dipped the fuel tank, and it looks promising!
After our mini 'flooding' at the end of last year, i'd assumed water had got into the fuel tank (the filler fitting isn't very secure), but extracting a small amount of fuel from the very bottom of the tank suggests its pink, and doesn't look contaminated.... Its pink I suspect as she's had white in the tank at some point (highly likely given where she was kept), but no evidence of water.
I really need two people to check it properly, otherwise i'll spray diesel everywhere, but early signs are positive.
4th coat
Don't suppose it looks much different in these pictures, but it is starting to get that 'mirror' look that I so much wanted.... 2 coats to go!

Friday 17 August 2012


Sunday 12 August 2012

Shiny shiny!
All wood now resplendent in a second coat of varnish... at just 25% thinners, so a bit more shiny.... Looks great.... pics to follow.
Will try to get back down next weekend to put 2 more of the 6 coats on...
Will try to get back down next weekend to put 2 more of the 6 coats on...
Saturday 11 August 2012
Phew... what a day!
Starting at 09:00, we sanded.... and sanded.... and sanded....
Finished sanding at 17:30.
Two and half hours of varnishing, and the first coat is on the toe rail.... Yah!
Couldn't take a photo as it was getting too dark!!
Will do so tomorrow.
Now I just need to hope it isn't too dewy tonight, and then that it dries in time for a second coat, as we are off home.
As previously, I suspect this first coat will be dissapointing as it is heavily thinned and just soaks in leaving a dull matt finish...
But its a start, and overall Phoenix looks a mile better than previously.
Friday 10 August 2012
Toe rail
Phew!
Just stopped for the day after an 08:30 start (sander a bit antisocial this time of the evening when people are enjoying time in their cockpits)
But..... another productive day...
Today's goal.... the toe rail...
We started by applying Nitromors in 3 feet chunks of the 3"x2" toe rail, with Debs applying, and me following behind with a scraper.... and so it went... on and on and on....
By 16:30, we closed the loop, back where we started... a full 110 feet of wood scraped almost back to bare wood... remnants of varnish remain in places... It must have been on 10 years, and it's like concrete!
We did however dance a little jig around the decks in celebration upon getting back where we started!
An hour or so with the sander saw 20 feet nicely finished... so a few hours tomorrow and we'll be ready to apply the first coat of varnish...
Can't wait!
Thursday 9 August 2012
Another fantastic day!
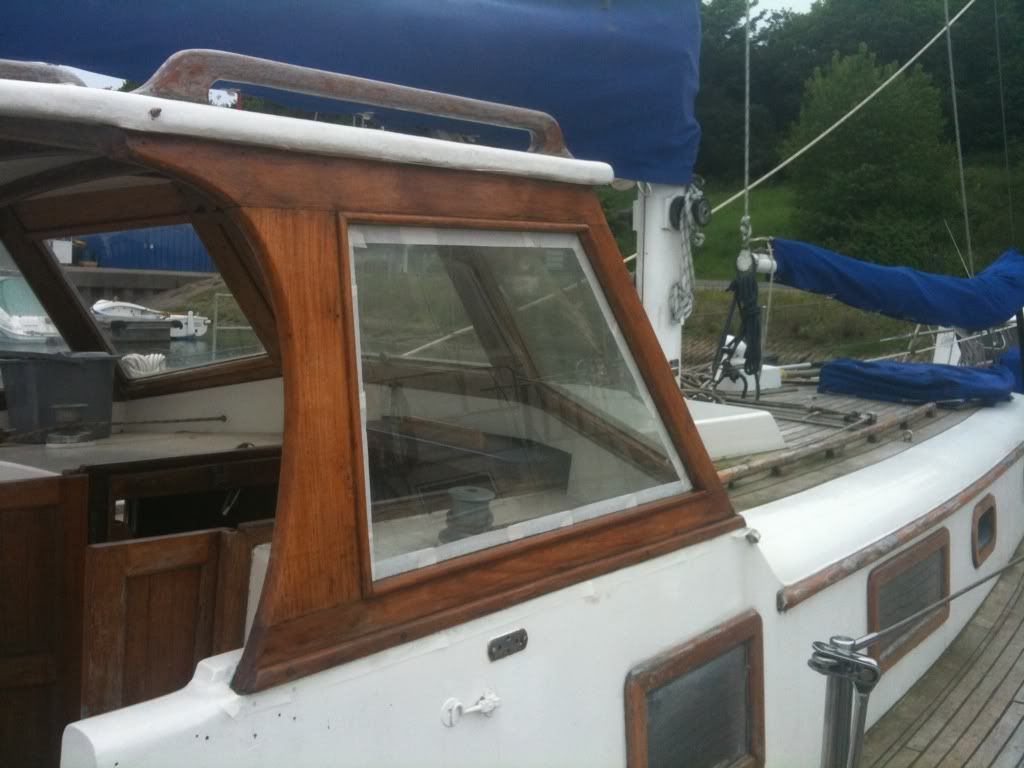
All the forward coach roof done.... Trim and windows... And a second coat on everywhere else...
She's looking fantastic!
Tomorrow, the toe rail begins... And that should really finish off her 'above decks' makeover.
She's looking fantastic!
Tomorrow, the toe rail begins... And that should really finish off her 'above decks' makeover.
Wednesday 8 August 2012
Sunshine
Finally!
Aft windows varnished... forward grab rails back to bare wood and varnished.... second coat on aft trim, aft grab rails and dog house...
Good weather forecast tomorrow too, so hoping that we'll finish forward trim and window frames and perhaps even start on toe rail...
Great progress!
Aft windows varnished... forward grab rails back to bare wood and varnished.... second coat on aft trim, aft grab rails and dog house...
Good weather forecast tomorrow too, so hoping that we'll finish forward trim and window frames and perhaps even start on toe rail...
Great progress!

Tuesday 7 August 2012
Varnish and dodging showers
An early start, with the sander, working on the aft coach roof grab handles and trim strip... And dodging heavy rain storms... Had to put a tarpaulin over the dog house to prevent the bare wood getting wet. Its not that the rain hurts the wood, but it takes 2hrs to dry out!
Anyway, the rain cleared, and a first coat on the dog house and then the handles and trim strip...
The first coat is always dissapointing as its heavily thinned, so just soaks in and leaves a dull matt finish... But even so, it still looks a lot better than the old cracked and faded varnish that it replaced.
Tomorrow, the aft coach roof window frames, and then start the forward coach roof equivalents.
Weather forecast is looking a lot better, so optimistic that we'll keep making good progress.
Monday 6 August 2012
Dog house
No, i'm not in it!
Its the hard cover over the centre of the boat.... And today i've sanded the outside back to bare wood... 8hrs sanding...
I did have to cover it up 3 or 4 times during the day when heavy thundery showers passed through.
Tomorrow varnishing begins!
Its the hard cover over the centre of the boat.... And today i've sanded the outside back to bare wood... 8hrs sanding...
I did have to cover it up 3 or 4 times during the day when heavy thundery showers passed through.
Tomorrow varnishing begins!
Sunday 15 July 2012
Galley done!
The galley is completed!
Another weekend on the chart table area, and the grand de-dust can begin.
It'll be a bit of a milestone as once the varnish goes on the saloon, it'll feel like the back of the jobs are broken... mind you, it'll take a whole weekend to get a coat on and allow for drying time, so it'll take a month to varnish it!
Saturday 14 July 2012
Dust
Galley now three quarters back to bare wood... should get it finished tomorrow... and a few more doors to take home... the pile is getting rather large!
Also, bought some resin and have mixed with filler powder and almost finished off remaking the holes where the old instruments were located. Just a final scrape of additional filler needed to fill a couple of remaining low points, and then paint the exterior.
Ended up removing all the instruments so that I can put them the new ones in the best location rather than be compromised by the position of the fuel guage and autopilot.
Had M on board helping.... A 13yr old boy seems to enjoy a power sander!
So.... the end of varnish removal in the main saloon is in sight!
No idea how i'm going to get rid of all the dust though before I varnish
Sunday 8 July 2012
Glass work
More sanding..... Saloon now all back to bare wood up to front of galley, and the galley started... All doors in galley removed.
I then removed the old instrument heads... Good job none of them worked as they were what an engineer would describe as an 'interference fit'.... easily solved with a hammer!
I put a few layers of glass fibre into the old holes and will fill remainder of holes with epoxy/microsphere mix next time... a bit of sanding and then I can fit new instruments.
I do have to repaint the outside, which will mean some colour matching, or may have to put a panel on if I can't get it to match.
Regardless.... another step forward... I reckon two more weekends should see my ready to start varnishing the main saloon.
Friday 15 June 2012
Thursday 14 June 2012
Piping
All the pipes now reconnected to seacocks.
Heads hoses replaced in aft heads... The old one were in terrifyingly poor condition and weren't connected... the new ones still aren't connected until I mount the toilet, but at least aren't going to fall apart on me!
The sinks are also now teed into existing through hulls rather than draining into the bilges!
I'm now starting to mount the bilge pumps... Plinth glassed in and waiting to cure... Cant mount the aft one... needs a little water pumping out and as its below the engine its very slightly oily, so need to be afloat...
Other than that... ready to launch tommorrow... Weather permitting.... Looks like a decent weather window in the morning... we'll see!
Wednesday 13 June 2012
Antifouled
Started at 08:00 this morning, and by just keeping going without a break, have finished the antifouling by 14:00.
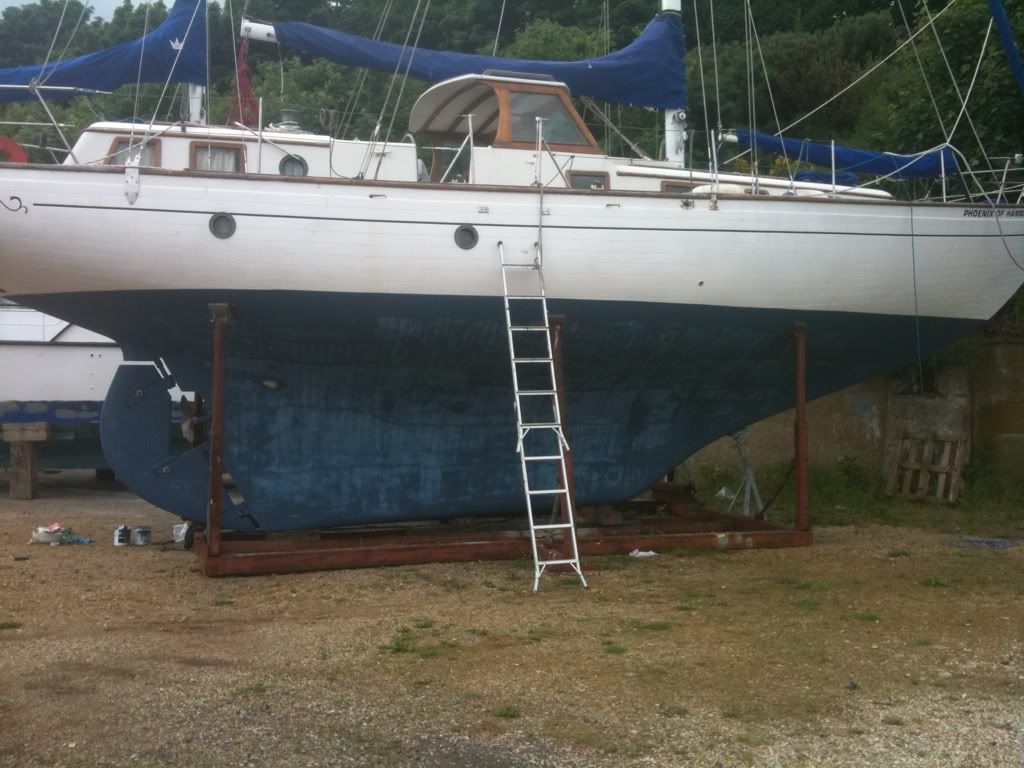 Just the prop to polish and she's done.
I've asked the yard if they can drop her back in Friday instead, which they're OK to do, with just the weather to keep an eye on... Looks like it could be breezy!
Just the prop to polish and she's done.
I've asked the yard if they can drop her back in Friday instead, which they're OK to do, with just the weather to keep an eye on... Looks like it could be breezy!
Just the prop to polish and she's done.
I've asked the yard if they can drop her back in Friday instead, which they're OK to do, with just the weather to keep an eye on... Looks like it could be breezy!
Tuesday 12 June 2012
All seacocked up
Another day of great progress...
After this morning's 'hold your breath and drill' moment, i've managed to fit 3 more outlets above the waterline... 2 for bilge pumps and one for fridge...
Was interesting on the starboard side where i've fitted one outlet... hull is nearly 2" thick!!!!!
I've also disassembled all the bronze seacocks and lapped them in, then reassambled... only worry is that i won't be around when she relaunches, so nervous about whether they remain watertight... If i get far enough, I may see if they can relaunch Friday instead while I am still about.
The seacocks didn't seem too worn though, but not being familiar with them not 100% sure if they are OK.
Pics to follow
If all goes well tomorrow reinstating the pipework to the seacocks, I might even be able to start antifouling.
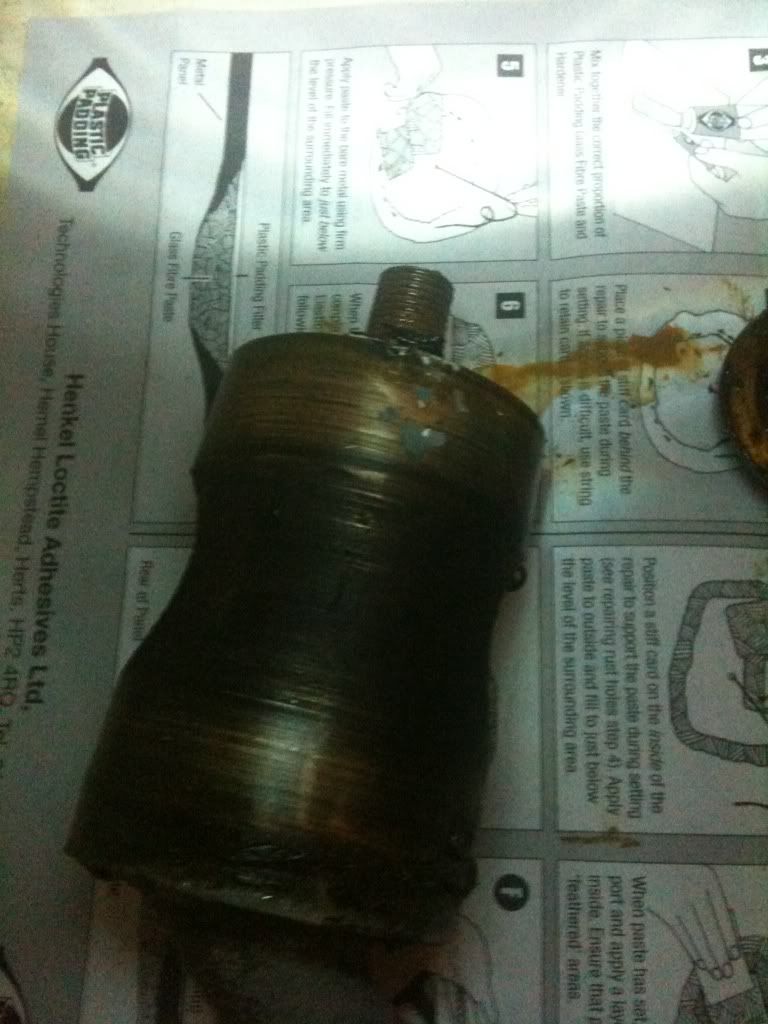
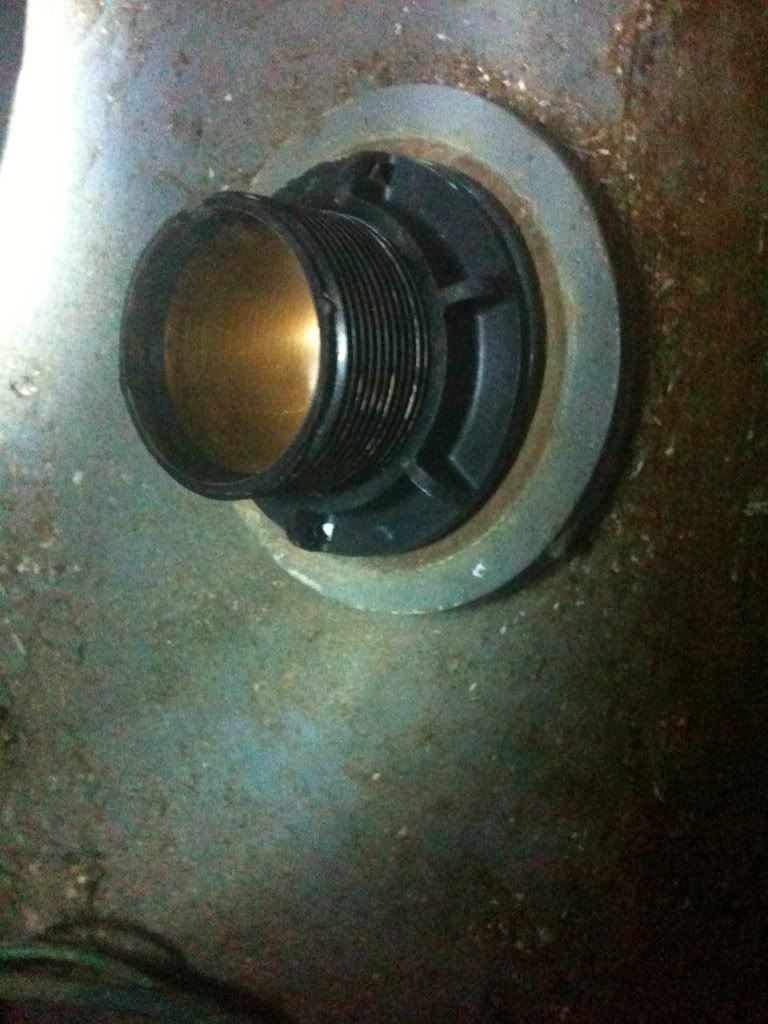
Holed below the waterline!
A water cooled fridge needs water... So I knew I had to fit a seacock below the waterline, with a strainer...
I decided where to put it, and then spent 20 mins procrastinating... putting off drilling a hole through the bottom of the boat.
Eventually, I picked my drill up and did it...
The bits are fitted... Lots of sealant, lots of PTFE... Just got to hope its watertight now!!!!

Monday 11 June 2012
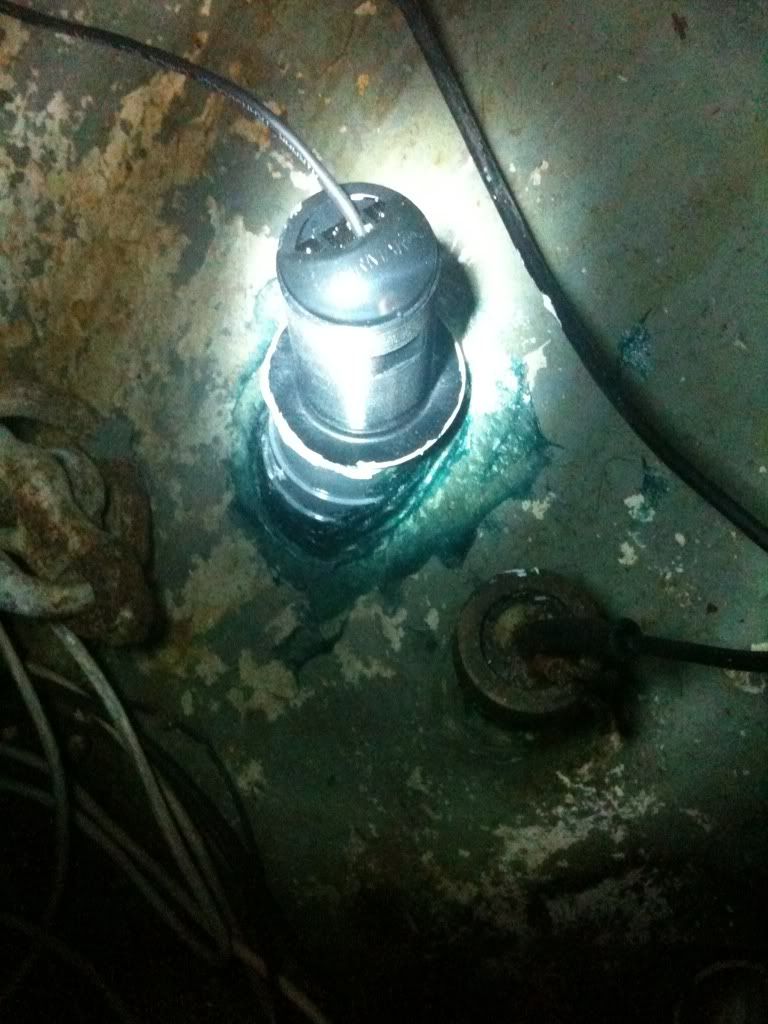
Fitting transducers
Was first on my list to give the sealant plenty of time to cure.
The log proved very easy... The old one came out with a bit of brute force and some digging with a screwdriver... initially it looked like the hole was 3 or 4mm too small... a bit of a pain as thats not enough to be able to drill out, but after some cleaning I discovered a sleeve... 4 screws buried in the antifoul on the hull, which remarkably undid quite easily and the sleeve for the nee sender very nearly fitted... a few mins with some sandpaper and in it slid... soon Sikaflexed in and tightened up... perfect!
The sounder was another story.
The only practical place for the sounder was where the previous one was fitted, or very close by. However, the deadrise was knocking on for 60 degrees, and it soon became obvious that i'd need a transducer a foot long to be able to fit it upright through such an angle... I decided that this needed a bit of thinking, and so set off to Foxes chandlery for inspiration and maybe an in-hull transducer.
They didn't have one. Or at least not one at the right frequency... but all was not lost... The guy at Foxes suggested that I try the through hull set in a bed of sealant in-hull instead.
I figured that I had nothing to lose by trying.
However, with so much deadrise, there would be a huge dollop of sealant that would hard to retain, so in a burst of inspiration, I nipped to a DIY store and bought a short length of soil hose... duly chopped and filed, I glassed it to the hull... and once set, filled it with sealant and plonked the sender on top...
Bonuses are no extra hole in hull, leaving the old sender in place for now meaning no hole to fibreglass up, and all done in a couple of hours.
Will it work?... Maybe... But lost nothing... If it doesn't then i'll have to try alternatives.
But, seeing holes in the bottom of the hull was 'wrong'!
Pics to follow.
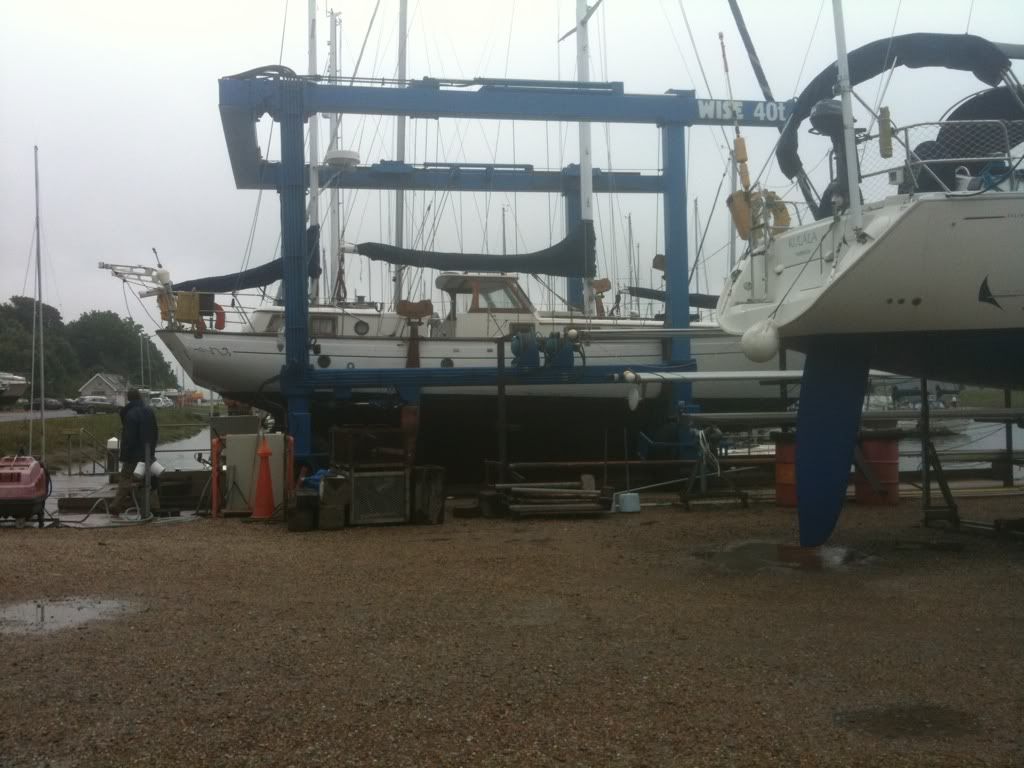
Lifting
Just watching the guys on the workboat move Phoenix to the lift....
Do you think I should tell the guy that they've put onboatd that the frantic turning of the wheel won't help as it isn't connected to the rudder!?
Do you think I should tell the guy that they've put onboatd that the frantic turning of the wheel won't help as it isn't connected to the rudder!?
Sunday 10 June 2012
Productive day
A good day of progress....
I started by getting on with some work on deck.... The state of the varnished woodwork has been a sort spot, so, with the sun out, I decided to start on the dog house... It quickly became obvious that it was a major task, and so with rain forecast for tommorrow, reduced my ambition to doing just one side... And then a single coat of heavily thinned varnish... Pics to follow, but very pleased with results!
I then plugged on with the saloon... well, i say plugged on, but first I needed to remove the saloon table.... just a quick job.... that took me 4hrs... It was a pig of a job entailing drilling out screws and half dismantalling it to get at other fixings... but out it came.
I then sanded and sanded and sanded....
I reckon 2hrs more work and the saloon will be back to bare wood all the way to the chart table and galley...
Lift out tommorrow and the focus must shift to the senders and seacocks...
Saturday 9 June 2012
Another dull post about sanding
A good day sanding means that the entire bulkheaded is now back to bare wood and halfway down the second side of the main saloon as well.
However I do need to move the table out and one of the retaining screws seems to have been corroded into small lump of something or other and looks like it's going to need drilling out....
That's a job for tomorrow.... I don't want to be drilling stainless steel this time of night!
Also removed the 6 remaining locker doors in the saloon.... Tiny little brass screws on the hinges that just destroy themselves when a screwdriver is applied... So that's been fun!
Heads
Second coat on the heads, and bar a few bits of finishing, its done!
 Back to the sanding now!!!
Back to the sanding now!!!
Still wet
Phoenix wasn't lifted yesterday.... It was blowing 50kts in the gusts, so she'll come out monday instead.
Now got a week onboard to get lots of jobs done.
Now got a week onboard to get lots of jobs done.
Wednesday 6 June 2012
antifoul up
Top marks to Compass24, who, upon being contacted regarding previously mentioned antifoul delivery disaster, immediately apologised, and arranged for replacement tins to be dispatched.
I've used them a fair bit, and always found them to be exceptionally pleasant and helpful to deal with, and this just confirmed that view.
Monday 4 June 2012
Antifoul
Had 5ltrs antifoul delivered.... 4.5ltrs relocated itself from tins into the cardboard box.... :(
Friday 25 May 2012
The pile is building
I've got a bit of a break on boat jobs due to family commitments, but she's out of the water shortly...
And the bits needed for while she's ashore are arriving steadily, and i'm slowly running out of floor space in the hall!
Finally, i've had to take a flyer on antifoul in terms of volume, and have opted for 7.5ltrs.... Hope its enough!!!
And the bits needed for while she's ashore are arriving steadily, and i'm slowly running out of floor space in the hall!
Finally, i've had to take a flyer on antifoul in terms of volume, and have opted for 7.5ltrs.... Hope its enough!!!
Friday 18 May 2012
pumps and pipes
Have today ordered all the bits needed to fit the fridge and bilge pump through hulls.
I've also ordered the 2 new bilge pumps needed.
I've got large deep bilges, and so have gone for slightly larger bilge pumps. They are barely any more expensive than the normal small ones, and for the additional peace of mind, its seemed worth it.
So we'll have the capacity to pump out 5,000 gallons per hour, or 17,000 Lites per hour if you prefer. This is of course theoretical capacity, and we will have a small rise to the outlet, so it'll be a bit less, so hopefully not too much.
I've also decided to fit seacocks to all the through hulls for the bilge pump and fridge, even though they are above the waterline. Better safe than sorry. I have however, gone for cheaper versions for these, rather than the very expensive Bronze versions, that are much better at handling electrolytic problems, with just the fridge intake that is below the waterline in Bronze (and that's only tiny, so not too expensive).
Along the way, i've managed to get the second coat of varnish on the doors for the forward heads. I'me not back on board until the following weekend, so hope to have them completed by then, to nicely finish the whole thing off.
Sunday 13 May 2012
And....
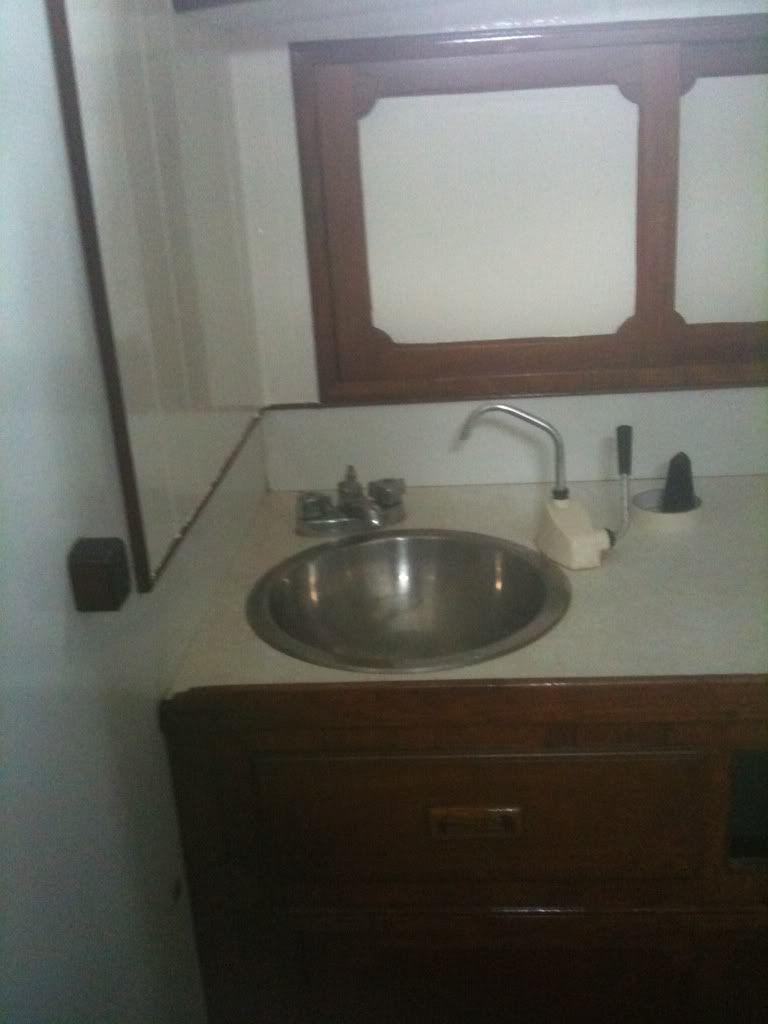
I've done the cabin sole in the heads with Ronseal Diamond hard satin finish clear varnish.
I've been advised to use an oil and wax, but concerned about it getting slippery when wet.
The Ronseal looks terrific, is easy to apply and dries quickly.
Now i've got to start thinking about the headlining too... Need to decide whether to use Ivory or white...
I also need to mend the hatch and stop another leak... Its fine with the cover on, but without it, there's a leak... And not putting the headlining in until that's sorted. My plan is to cut a sheet of heavy ply and bolt it into place temporarily while I bring the hatch home to remake. That'll also mean new catches and struts... Its only money!
On and on and on and......
A good weekend of progress...
The new mast boot is fitted, so that should be the leaks stopped...
And then on with the interior.
The final coat of matt varnish applied in the forward heads and the toilet removed... I then repainted the toilet plinth, and varnished the cabin sole in the heads.
And then finished off by reinstalling the loo and putting the first coat of white on...
So, the forward heads nearly done. One more coat of white and refit the headlining trim (which is at home waiting to be varnished, and will be done this week) and that's another cabin finished.
Finally, i removed some more varnish from the main saloon.
So, must keep plugging on.... Its feeling like progress!
Thursday 10 May 2012
Deadlines
I've tentatively set myself a date of 4th Aug to have enough done on Phoenix to get her out of the marina, but the more I think about it, the less likely I think I am to achieve it...
I keep adding things to the list of 'must do's' as I think about it... and the list is getting pretty darned long!
Its not a case of picking the things that will make it possible and bring ruthless... There are a ton of things that are essential, and i'll either run out of funds or time.
Examples i've recently added include getting an ensign staff and mounting it, new batteries (i'm pretty sure the old ones are a bit too tired), fitting an anchor light, nav lights, installing the VHF and aerial, new wiring for the windlass, draining and cleaning the fuel tank and wiring up the alternator, starter and gauges....
Not to say i wont keep trying, but confidence not high.
Sunday 6 May 2012

Saturday 5 May 2012
Heads ahead
The forward heads is back in bare wood.
I have also removed the toilet, which might be 'interesting' later!, so that i could take the sole (floor for the landlubbers) back to bare wood. I needed to do this, as putting the toilet back in will make it inaccessible.
So, varnishing starts shortly!
I have also removed the toilet, which might be 'interesting' later!, so that i could take the sole (floor for the landlubbers) back to bare wood. I needed to do this, as putting the toilet back in will make it inaccessible.
So, varnishing starts shortly!
Wednesday 2 May 2012
Target dated
I've always had this year written off in my head from a sailing perspective, but progress has been good, and now i've got a goal!
Our annual pirate weekend is set for the 4th August... A bit later than usual, so i've a fighting chance of making it our first trip...
Better knuckle down!
Our annual pirate weekend is set for the 4th August... A bit later than usual, so i've a fighting chance of making it our first trip...
Better knuckle down!
Tuesday 1 May 2012
back on the varnishing
Well... at least the stripping!
I still have a seat to do from the forepeak, so thats been taken back to bare wood this evening. I also brought home the various locker doors from the forward heads.. so did one of them too.
The seat lid is the only thing i`ve found on the boat that is veneered, and in one corner it had just started lifting, so i`ve put a dab of varnish on it, and its now weighted down until it`s properly fixed back in place. Then i can start varnishing again!
This weekend is looking like a weekend of varnish stripping again... hope to get the heads done and..... start on the main saloon.
Lift out now in sight as well.... special offer starts 28th may, so will be after that... lots to do while she`s out of the water!
Sunday 29 April 2012
fitting the evaporator plate
I'd measured the freezer box, and the lid, and the challenge was that while the freezer was 32cm wide, the lide was only 26cm wide.
Penguin advised me that there was a little give in the plate, so I ordered one with a 27.5cm side, and hoped that it would go through the lid.
It did with a little 'persuasion'!
The challenging thing then was bending the pipe work to go through the hole still... this involved some contortion.... and it was noticeable that the last 3" or 4" was hardest of all, with the copper starting to work harden.
But, it all went in eventually.
Drilling the holes to mount the plate was equally difficult, as the fridge isn't wide enough for a drill..... however, I did eventually work out that my cheapest electric drill is the smallest, and by making sure that the drill bit was right into the chuck, I cxould JUST get the drill in far enough to do its job. As the freezer internals are finished in a fibreglass shell, there was no way that a self tapper would work, so had to be drilled.
After switching on, in about 30mins, the freezer has dropped below zero... and then I turned it off, rather than start building up ice on the plates to melt and sit in the bottom.
I don't have a drain in either the fridge or freezer, so may need to review whether that needs addressing in the future.
Further to this, I then put another layer of bin bags around the mast where it passes through the deck... its still leaking a little, and the replacement mast boot still hasn't arrived.
Oh... last, but not least, I forgot to measure the pipe size for the heads and engine again, so still can't order all the bits for the lift out... but that's not the end of the world, as the summer lift out deals don't start until the 28th May, and so i'm not lifting before that, as it will save over £400.
Saturday 28 April 2012
Cold beer!
The Fridge/freezer is installed and working. Hoorah!
Drilling the holes for the pipework was challenging through 15cm of insulation... Not because its hard to drill through, but finding a long enough drill bit!
And then bending the copper tubes...
The compressor and pump proved easy to mount, but the wiring was a bit complicated with two thermostats, a fan and a pump...
But all done.
The water will eventually come and go via through hulls, but for now they're into a bucket!
So, we're starting to get civilised on board.
Wednesday 25 April 2012
Freezer
Ordered the new Freezer/fridge system today from Penguin refrigeration.
What a pleasure it is to deal with a company who know what they are talking about, call back when they promise, and are friendly and helpful. Top marks to them!
My challenge was that the condensor panel that goes in the freezer is quite large and needs bending round 3 sides, and on top of this, the lid is a fair bit smaller than the freezer box.
Penguin asked me to sketch up the box and lid with dimensions, and send it to them. They replied within 10 mins with the panel added to my sketch, with suggested bends in the panel, and offered to bend it to the measurements free of charge.
They also advised on the optimum bend places to fit it to box, but also through the lid... Then to cap it off, suggested that if it didn't fit, to send it back, and they'd rebend it for me.
Can't wait for ice cubes!!!!!
Spend spend spend
Ordered the instruments, vhf and aerial this evening.
Gone for basic Advansea instruments, with an analogue wind gauge. They are NMEA 0183, but seem solid, and keenly priced.
Also ordered an NMEA mux so that i can take all the instrument info to the plotter and a PC in the future.
The radio is a Standard Horizon GX2100E, with a remote command mike. I'm a real SH fan, and think their quality is superb. Also having had a command mike in the past in the cockpit, i'd never be without one again!
The radio has built in AIS, so that will eventually feed to the plotter, but in the meantime, will show on both the radio and the command mike.
Finally, an aerial... Nothing flash.. Just a 1.1m stainless steel whip.
I was also going to order the new bilge pumps and seacocks this evening, but have forgotten to check the pipe diameters for the engine intake and heads intakes. I'm replacing three seacocks (the engine and both heads inlets) as they are below the waterline and currently stainless steel... They'll be replaced with DZR versions.
I've also got a few new fittings to add... The fridge inlet and outlet (which will also service the watermaker), and three outlets for new bilge pumps. I've decided to fit seacocks even on the outlets above the waterline... For the sake of a few quid, better safe than sorry.
The bilge pumps are monsters!
Two biguns, at 2000GPH and one smaller one at 500GPH... That works out at a system that all full chat can shift 16,000ltrs an hour!
So, besides finalising the measurements for the above, that just leaves the fridge/freezer to order in this round.
Once that lot is fitted (via a lift out along the way), then i've only got nav lights to sort, and then bar finishing the starter and alternator wiring on the engine and flushing the fuel tank... and seeing if i can get her started... and we could possibly have a small trip out of the marina!
Not sure what the starter and alternator will be like after their little 'ducking' last autumn... They were thoroughly rinsed and dried, but perhaps 6 months of corrossion will have taken place. Only time will tell.
Sunday 22 April 2012
Quite a succesfull weekend
Besides getting the gas system in, I managed to get another (final) coat of white paint on the forepeak bulkhead, and remove all the headlining and trim from the forward heads, ready to start stripping back to bare wood.
Will be ordering fridge, instruments etc next week, so not sure i'll be starting the heads anytime soon.... but who knows!
Will be ordering fridge, instruments etc next week, so not sure i'll be starting the heads anytime soon.... but who knows!
Saturday 21 April 2012
Gas at last
I've got the oven plumbed in... No leaks!
....so au revoir pot noodle... Can't say i'll miss you!
Friday 20 April 2012
On board and not wet!
The leaking mast boot hasn't let much in... and all rain that has come in has been caught in a strategically placed pot!
Good job really as new mast boot hasn't arrived yet.
However, power appears to be a bit low... Not getting the full 240V.. A problem on shore... So kettle is taking 15mins to boil!
Thursday 19 April 2012
Slight change of heart on seacocks
Been doing some investigating on the seacocks fitted on Phoenix.
It appears they're Spartan branded, made in the USA. They're solid bronze, imminently serviceable and very very expensive!
In short, they are of the highest quality, can be lapped and greased rather like European Blakes, and at $775 each, made to last.
I think i'll perhaps try and keep them!
Wednesday 18 April 2012
Nmea
Can get quite complicated!
Sorting out my network before i order bits.... Would appear straightforward at face value.... But then you discover that certain devices that have 2 ports can only be configured certain ways... Certain services need different Baud rates.... and certain devices only output certain info... So you end up with a complicated set of connectivity... Think i've nailed it... Hope it works!
Also, have ordered all gas bits today... Due to be delivered tomorrow... So should have a working cooker by the end of the weekend... Yah!
Tuesday 17 April 2012
Fridge freezer
I've specced up for a fridge and freezer system, as we've got two cold boxes, so may as well make use of them.
There are various options for cooling a fridge... All use a compressor, but there are 3 different options for cooling the compressor... Air, water or water via a keel plate.
Air is the cheapest, but heat transfer in air is very inefficient, and not recommended for hot climates.. So it would work fine in the UK, but if our long term plans come together, would be very heavy on the batteries as we head south. Its how a domestic fridge or freezer works
Water is much more efficient, but needs a pump, plus holes in the hull to take water in and out... So i can install it, but can't use it until she's lifted and i fit seacocks.
The final option uses a second compressor to a special plate that fits on the keel. Its about the same efficiency as a standard water cooled system, but without the pump is much quieter and uses less power.
We think we'll go for the water cooled version and perhaps convert to a keel cooled version later as we can afford it.
The seperate fridge freezer is quite clever... The cold plate is in the freezer, and then a small hole between the freezer and fridge compartments is fitted with a fan to 'spill' cold air over to cool the fridge. Each is fitted with a thermostat to keep it at the right temperature... Neat huh?
This week's challenge
...is to spend a shed load of money on bits i need for the boat...
Includes:
New instruments with senders
New VHF radio
New aerial
Gas pipe
2 gas bulkhead fittings
Bubble tester
Two skin fittings and pipe for gas drain
Fridge and freezer compressor, holding plate and pump etc
That lot should add up to £2.5k - gulp!
Sunday 15 April 2012
A leak
No work on the boat this weekend, instead getting the family onboard to inspect progress and for a social gathering with a few friends (sore head territory!)
All is well onboard, but the mast boot has started leaking.
Actually its generous to call it a mast boot. Its more a lump of old plastic wrapped around the mast.
So new boot and some self amalgamating tape ordered this evening.
Hopefully it'll be dry next weekend so that i can fit it!
Monday 9 April 2012
Which instruments?
Got to get Phoenix lifted before too long to replace all the seacocks... And while she's out, it makes sense to fit the new instrument senders... So got to decide which instruments before too long...
Currently thinking that i'll go with something pretty basic, rather than the modern colour sophisticated systems available as i can repeat all NMEA data on the plotter anyway...
Favourites at present are Advansea... I can get a complete set of three displays with all senders for £649!
That compares with £1200 for Raymarine or £800 for a Garmin system with just one display!
So, it'll be a busy time when she's lifted with (I think) 8 seacocks to fit below the waterline, and 4 above it, new senders, and all the holes to refill/resize with epoxy.
I'll also need to antifoul and redo the boot topping while i'm at it... Phew!
Sunday 8 April 2012

Some final white
Painted the final finishing white bits... Will need another coat.
Its 'contemporary white', and its just off white enough to look absolutely terrific!
Its 'contemporary white', and its just off white enough to look absolutely terrific!
First set of cupboard doors back in
Really pleased with the final finish, and the brasswork looks great!
Saturday 7 April 2012
And back to satin
The final coat of satin varnish on
A few bits still to do, but yesterday's 2nd coat still not completely dry in places, so will leave until tomorrow.
Now i can refit the doors!
A few bits still to do, but yesterday's 2nd coat still not completely dry in places, so will leave until tomorrow.
Now i can refit the doors!
Friday 6 April 2012

Shiny!
Second coat on.... Its VERY shiny!
Its a good job i'm putting a satin coat on top, or you'd need sunglasses on to enter the forepeak!
Pics to follow.
Wednesday 4 April 2012
Doors varnished
All 5 doors for cupboards and locker now resplendent in their third coat of varnish.
I've ordered new hinges, catches an latches... £85 for just the 5.... Going to be expensive when I do the saloon!
I've ordered new hinges, catches an latches... £85 for just the 5.... Going to be expensive when I do the saloon!
Sunday 1 April 2012
Didn't dry
Slightly cooler weather, so varnish didnt dry in time.
Satisfied myself by starting to prep the forward heads... And then came home and stuck another coat of varnish on the doors instead!
Saturday 31 March 2012
First coat on!
Took me longer than i thought.... 4hrs to do one coat
It was thinned to 50%, and so a lot has soaked in... So only some of it has that nice shiny finish.
Another coat tomorrow, and then the final matt coat next weekend.
This week i'll finish the doors at home, order some new brass hinges and catches and refit, and then it'll be time to move on to the white bits. You'll see that i've not done the floor/sole yet... That'll wait until I've done all the other painting, and the last task before fitting a new headlining.
Friday 30 March 2012
Ready to start varnishing!
Another 14hrs of sanding, and ready to varnish in the morning... Yaaah!
Spent the last 3hrs cleaning, wiping and hoovering to reduce dust levels, and then wiped down all wood with white spirits....
And tomorrow the good bit begins!
(and then i've got the saloon to start.... 5 times the area!!!!)
Thursday 29 March 2012
Another good day
....of sanding and scraping....
Both sides of forepeak bare, and most of top part of remainder of forepeak.
I reckon that i'll have the whole forepeak ready to start varnishing by Sunday, which means that Easter could be a rewarding weekend!
One awkward bit today has been the little fiddle rails on the shelf.... Lots of small shaped/turned pillars that were very difficult to sand.... but patience is a virtue.
Wednesday 28 March 2012
Shiny portholes!
I've got a few days onboard to really get stuck in...
Arriving too late to start more varnish removal, i thought i'd have a go at the brass portholes... Years of neglect has left them green and nasty.... But i've found the answer... 1000 grade wet and dry, followed by Brasso. I've only done one so far, but its come up a treat!

I need to do the ones in the forepeak before i can varnish in there (who am i kidding.... days of sanding left yet!)
Arriving too late to start more varnish removal, i thought i'd have a go at the brass portholes... Years of neglect has left them green and nasty.... But i've found the answer... 1000 grade wet and dry, followed by Brasso. I've only done one so far, but its come up a treat!
I need to do the ones in the forepeak before i can varnish in there (who am i kidding.... days of sanding left yet!)
Sunday 25 March 2012
ok, so you`ve guessed...
More sanding and varnishing...
All the trim for the forepeak headliner is now done, and 2 of the 5 cupboard doors are underway.
I`ve got a bit of annual leave coming up, plus easter, so should be able to make some real progress in the next few weeks.
All the trim for the forepeak headliner is now done, and 2 of the 5 cupboard doors are underway.
I`ve got a bit of annual leave coming up, plus easter, so should be able to make some real progress in the next few weeks.
Sunday 11 March 2012
the other half
Started on the port side of the forepeak, and managed about one third of it before the fumes and time of day caught up with me!
I reckon one more decent weekend should see the forepeak, at least back to the heads anyway, ready to varnish.
That`ll be a milestone!!
I reckon one more decent weekend should see the forepeak, at least back to the heads anyway, ready to varnish.
That`ll be a milestone!!
Saturday 10 March 2012
More sanding
After another 12 hrs of scraping and sanding, the entire starboard side of the forepeak and the bow end bulkhead are back to bare wood!
I've also pulled out the anchor chain, cleaned out the locker and replaced the chain, and then removed the doors to take home and sand and varnish during the week.
Slow, but steady progress.
Thursday 8 March 2012
Coat 2
Second coat on....
Wavering about the matt final coat now as the battens look so lovely after a second shiny coat!
Saturday 3 March 2012
Varnishing technique
4 battens in total now stripped, sanded and have their first coat of varnish.
I'm using Epifanes Tung oil varnish, which when thinned down by 50% for the first coat, goes on beautifully. I'm looking forward to the final coat as the unthinned stuff will be a real treat!
I'm going for 3 coats only on this internal stuff... One 50% thinned, one 20% thinned and then a final coat of the 'brushed effect' version to get a nice matt finish. In between coats i'll rub down with 320 grade to just flatten off to get a good finish... Got a bit of work to do though reducing the dust levels... Nothing too serious, but you can see the odd spec in bright light.
Varnishing
After the 'fun' of putting a new fence post in this morning, i've spent the afternoon sanding one of the headliner battens... Couldn't resist putting a coat of varnish on it afterwards!
Looks great!!!!
Friday 2 March 2012
Seacocks
Almost 100% certain that im going to put Marelon seacocks in.
I think the advantages of no corrosion outweigh the minor concerns over durability. That and the fact that proper bronze ones are SERIOUSLY expensive!
Mind you, even the plastic Marelon ones aren't cheap... a 1-1/2" seacock in Marelon is still £85
The seacocks themselves are pretty substantial though.
I've got a fair few to fit... 4 for the heads, 1 for each of the three sinks, 3 for bilge pumps, and one for the engine intake.... And i bet i've missed some if i think about it!
Pause
Not working on the boat this weekend, but have spent all evening selecting instruments, seacocks and bilge pumps... Going to have to spend some money!
Might however get some of the wooden battens from the headliner out of the garage and start sanding and varnishing... Glad i brought them home now!
Sunday 26 February 2012
Another good weekend's work
A bit of good weather makes all the difference!... Was able to open up all the hatches and get some fresh air through the boat.
Spent most of the weekend removing varnish from the forepeak... And still only got half of one side back to bare wood. Modern varnish remover is rubbish, leaving big areas untouched, so had to resort to wire wool. This works ok, but does leave the hands somewhat sore!
So, i mixed the varnish removal up with a few other jobs.
The shower pump is now in and working, as is the GPS... All through my nice shiny new switch panel.
I also managed to pull through the loom of wires to the chart table, which was a fiddly and awkward job, but one im pleased to get completed. Now the chart table is ready to be wired up once the varnishing is done.
I finished up by having a darn good tidy up, which left the boat looking much better, and me raring to get on!
Sadly had to leave by 10 on Sunday morning for family commitments, but all set for more!
Sunday 19 February 2012
Not much done
A bit of scraping, a bit of sanding... Then too cold!
Plus i need a respirator in order to do much more varnish removal, or i'll make myself ill!!!
Saturday 18 February 2012
At last...
After a break from working on the boat enforced by initially familly commitments, and then the weather, i'm finally able to get on again...
Today's been a good day... The headlining is down in the forepeak, and the wiring in for the lighting and the forward nav lights.
Ok, nearly anyway. Actually, just the main light is wired in. The wiring for the nav lights is in, but coiled up below deck and not yet run up to the lights yet and the headlining isnt all coming down. Some of it is melamine instead of material and was ok bar having some varnish on it from sloppy brushwork by a previous owner... But it came off easily with a kitchen scourer... Thats one job less on the list!
So now i've got varnish remover on, and once thats done its magic, i can start scraping. Sadly i can only do 0.5m2 at a time... Partially because the remover goes off and partially because of the fumes!
Still... Its nice to be getting on again.
Sunday 8 January 2012


Scraped clean
Well, the forepeak is all back in wood.
I haven't removed headlinjng as i'm not sure i'm going to...
Started stripping varnish off, but need a respirator... Fumes too much!
It still looks a mess, but a lot better than it did... Pics to come soon
Saturday 7 January 2012
Scraped for hours
15hrs of scraping and i've got the forepeak 75% back to varnished wood... The paint came off easy in places, and less so in others!
It looks much better back in original condition... Just the varnish to sand back and a revarnish and it will look great.
Hope to finish the scraping tomorrow, and get the headlining down... If i achieve that, it'll be a good weekend's work
Sunday 1 January 2012
Red diesel explanation
The story of red diesel would be somewhat comical if it weren't for the fact that its completely true.
Let me give you a bit of history first:
For many years, from the advent of modern yachting after the second world war, diesel in use by yachts across much of Europe was supplied free of road tax, and often marked with dye to avoid it being illegally used in road vehicles. In the UK, Belgium and Holland in particular, it was dyed red. This is the same red fuel that is used by farmers and in domestic heating without the tax burden.
In the early to mid 2000's, it was becoming less politically acceptable across Europe for yachting to receive fuel tax free as motorists were increasingly squeezed with rising fuel prices and increasing tax levels, and thus, Europe passed legislation to require tax to be paid on fuel for boating for leisure, just leaving commercial users (mainly fisherman) not paying tax.
While its fair to say that the sailing community, and especially the motor boating community were unhappy about paying road tax on fuel, they accepted it with a degree of resignation. The body representing boats, the RYA, even managed to negotiate a degree of common sense in getting the government to accept a 60/40% split on fuel tax to allow for the amount used for heating on board.
It did however, leave one problem.
The UK has a geographic/demographic problem not seen anywhere else in Europe. That is that it has a long coastline, with a lot of boating spread round its shores, and a large (albeit diminishing) fishing fleet. This means that the supply arrangements are complicated. Red diesel is required in remote locations for the fishing fleet, but also relies on pleasure yachting to maintain an acceptable level of demand. Switch to unmarked white diesel, and the fishing fleet can no longer get fuel, leave it red and large parts of the UK coastline become no go areas for yachts. Either way, communities and businesses are destroyed.
So, the UK government decided to retain red diesel, and just charge tax to yachts.
This seemed a sensible solution, but then mainland Europe stepped in.
The legislation from Europe actually said, not only will tax be paid on fuel, but that the fuel must be unmarked.
And several countries are applying this rule very robustly.
Belgium in particular required its suppliers to clean their tanks and switch to unmarked fuel, and are now declaring red fuel illegal, and punishable by a large fine if found.
This leaves UK boaters in an impossible position. They can only get red fuel, but it is illegal in most of mainland Europe, hence rendering visits highly risky.
The Belgiums are setting penalty fines of several Euros per litre of tank capacity. Some larger motor boats and motor yachts can hold several thousan litres of fuel, so fines can be very large indeed.
The question has been raised in Europe
http://www.europarl.europa.eu/sides/getDoc.do?pubRef=-//EP//TEXT+WQ+E-2011-005901+0+DOC+XML+V0//EN
And the answer came back loud and clear... tough... its illegal
http://www.europarl.europa.eu/sides/getAllAnswers.do?reference=E-2011-005901&language=EN
So... we remain stuck.
YBW forum user, Burnham Bob even wrote to the Belgian embassy asking for clarification, and received the following reply:
Dear Mr *******,
I’m contacting you following your writing to the Belgian embassy. Unfortunately the email you sent via the embassy website was not passed on to me and I apologise for that.
The Belgian authorities are currently awaiting the result of an investigation launched by the EU Commission following a UK complaint pertaining to the fining of yachts using red marine diesel in Belgian waters. Let me reassure you that my authorities will implement the COM’s recommendations, whatever those might be, once they have received them. Meanwhile, they will continue to implement strictly the EU legislation as they understand it should be.
So... it seems they agree with the European parliament...
He followed this up with more questions, and received further clarification:
Dear Mr *******,
I apologize for the somewhat belated reply to your last email but I wanted to make sure I had all pertinent information in my possession before coming back to you.
Although I understand the difficult position you and other British cruisers are in, I have to confirm that Belgium will indeed continue to fine pleasure vessels using dyed diesel. EU legislation clearly does not allow the use of dyed diesel for leisure vessels and Member States have to conform to this. It is worth noting that Belgium also used to allow for an exemption for pleasure vessels but put an end to it on the 31st of December 2006 in order to be in conformity with said EU legislation.
Belgian authorities have been in contact both with their British counterparts and with the Commission to explain it had no other choice but to implement EU legislation. Not doing so could be considered as an infringement. The Commission has never berated Belgium for its practice of fining the use of dyed diesel. Quite to the contrary, it is my understanding that the Commission has asked British authorities for explanations pertaining to its continued use of dyed diesel and started an investigation against the UK . Some of the confusion surrounding this question arises from early letters from the Commission which unfortunately contain some inaccurate information. As mentioned in my first email, we are currently waiting for a decision from the Commission and will in the meantime continue to respect and implement the EU legislation on the use of diesel.
Regards,
Serge Dickschen
Counsellor - Political Affairs
Embassy of Belgium
17 Grosvenor Crescent
London SW1X 7EE
020/7470 3727
So... where do we go from here?
Well, it appears no where at present... the situation is apparently being tackled by the RYA, but they are very quiet on the subject, with little or no communications of any value to the boating community, so not really sure where that is heading... in the meantime, the only answer is for UK flagged boats to avoid Belgium and Holland (and possibly France soon), and for boats from those countries to avoid the UK... sad, but the only viable option.
If you've bothered to read this far, then its probably because this issue affects you directly... so please make an effort to retweet, FB, or link to this post... the more attention we can get on the issue the better.
An interesting year for boat owners
2012 is shaping up to be a challenging year for anyone who owns a boat and makes international passages.
Firstly we have eBorders coming our way. This is government legislation making its way through the system, with the admirable intention of making it harder to enter the UK with nefarious intentions.
Unfortunately, as only governments can do, it appears that the approach being proposed will be thoroughly impractical.
Passages will require 24hrs advance notice with an ETA given.
Now, this may prove impractical for a host of reasons, including difficulties in providing the info when access to the internet or mobile signals is restricted due to location. Imagine that anchorage you love so much, where there is no mobile signal.
There has been suggestion of having a VHF radio option... Now i don't know about you, but i'm not keen on reading out my passport number over a public radio network!
It also leaves us a little exposed to taking risks with weather. Will we make decisions to leave for a foreign port due to reporting requirements, when previously we would have stayed put?
I'm sure the more prudent will still exhibit seamanship and do the sensible thing, but it could be at the risk of breaking the law.
Secondly, we've got a problem with red diesel heading our way.
As of today, we can put diesel in our boats, tax paid, but marked as red, so that fishing vessels can fill from the same source tax free. Without this 'quirk', there would be serious supply problems for either yachts where fishing is the predominant activity, or vice versa.
However, several European countries have deemed it neccessary to fine vessels with dyed fuel in their tanks.
So this leaves us in a position where the only fuel we can get is illegal in mainland Europe.
The Belgians seem to be leading the charge on this one, but the Dutch aren't far behind, or the French either.
Not really sure what the resolution is, but expect a few boats to get heavy fines, and an uproar to get started!
Watch this space to see how it all plays out!
Subscribe to:
Posts (Atom)